A sample player I suppose is more apt. This is just the initial minimum setup but it works! It uses the same approach as the Wave mode in that it uses a variable clock to the DAC to control the pitch and sample rate. This gives it a more unique sound with, yep, some intentional aliasing. The samples are 8-bit unsigned raw PCMs and can be up to 64k in length though I may be able to get well past that limit by using a buffer and reading off the SD card. I didn’t do that here since I wasn’t sure if it could properly keep up (it seems like it can).
https://youtube.com/shorts/RJeNhp6cbwE
I have some ideas on what I can do to make things more interesting though. For instance, I could use the CV input to control to change samples, I could add looping and ping-pong options, etc.
Curious what folks think and if you have any suggestions! This is sort of a bonus feature – the main purpose of WaveBoy is, well, the Waves! But since there’s plenty of space and horsepower on the microcontroller, I’ve been wanting to try my take on a lo-fi sample player and here it is!
Panel and Screen Options for WaveBoy
I’ve been trying various screen, knob, and panel combinations for WaveBoy and will probably settle on the options seen here:
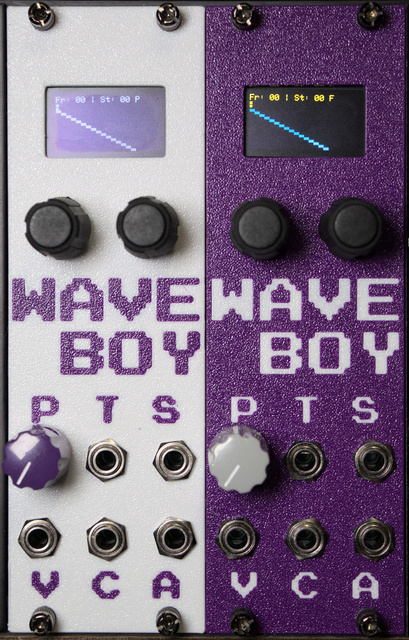
The two panel options I am looking at for the 3D printed panels are purple on white, white on purple. I may also offer black on white and white on black though I find those don’t pop quite as much and I plan on keeping at least a small inventory of panels due to the multi-color printing process I have to use. The tune knob options will be purple or grey and I’m sticking with rubbery black knobs for the top encoders for now. The OLED displays will be offered in white or the yellow/cyan. I find the white looks more aesthetically pleasing, but the yellow/cyan is easier to read.
I’m also still looking at FR4 and aluminum panels. So far those have been cost prohibitive for what I want though I am still evaluating options. If I do there’s a chance they won’t be available in the same colors as the 3D printed panels Folks may have also noticed I now have a documentation portal linked off our main website. The direct link is https://waveboy.bitbybitsynths.com.
All that to say, if indirectly, I am getting close to having at least a small number of WaveBoys available for purchase for early adopters. I may also set aside a few of these for some beta testing and might be looking for beta testers. There are still some features I want to work towards and a few bugs to sort out but it’s very usable already, both for its original purpose of the 4-bit wavetable stuff, as well as the noise algorithms. I have used both in my band with success.
If you’re interested in picking one of these up, I’d love to hear from you! You can use the contact form or send me a ping on our Instagram (@bitbybitsynths)!
WaveBoy Firmware 0.3
Here’s a quick demo of some of the new features of Firmware 0.3, including new default patches (including a wrapping Saw to get the LSDJ style wave vowel/filter sound) and 6 noise modes as well as showing what it sounds like through a filter. Wasp in this case, though I didn’t go bananas with it since I wanted to showcase sounds from the WaveBoy itself.
https://www.youtube.com/watch?v=LCqC3Gd7GWg
No talking just noise!
Finally Updates to WaveBoy
Yesh it’s been quite some time since I worked on WaveBoy. I finally got back to working on the firmware and realized I hadn’t finished moving features over from the old (very messy) firmware to the new (much cleaner) base. So I spent a good chunk of the weekend doing that. But I did also get around to writing a Python script to generate some fun waveforms. Here’s one of them!
https://www.youtube.com/watch?v=SH5oU5W5m5o
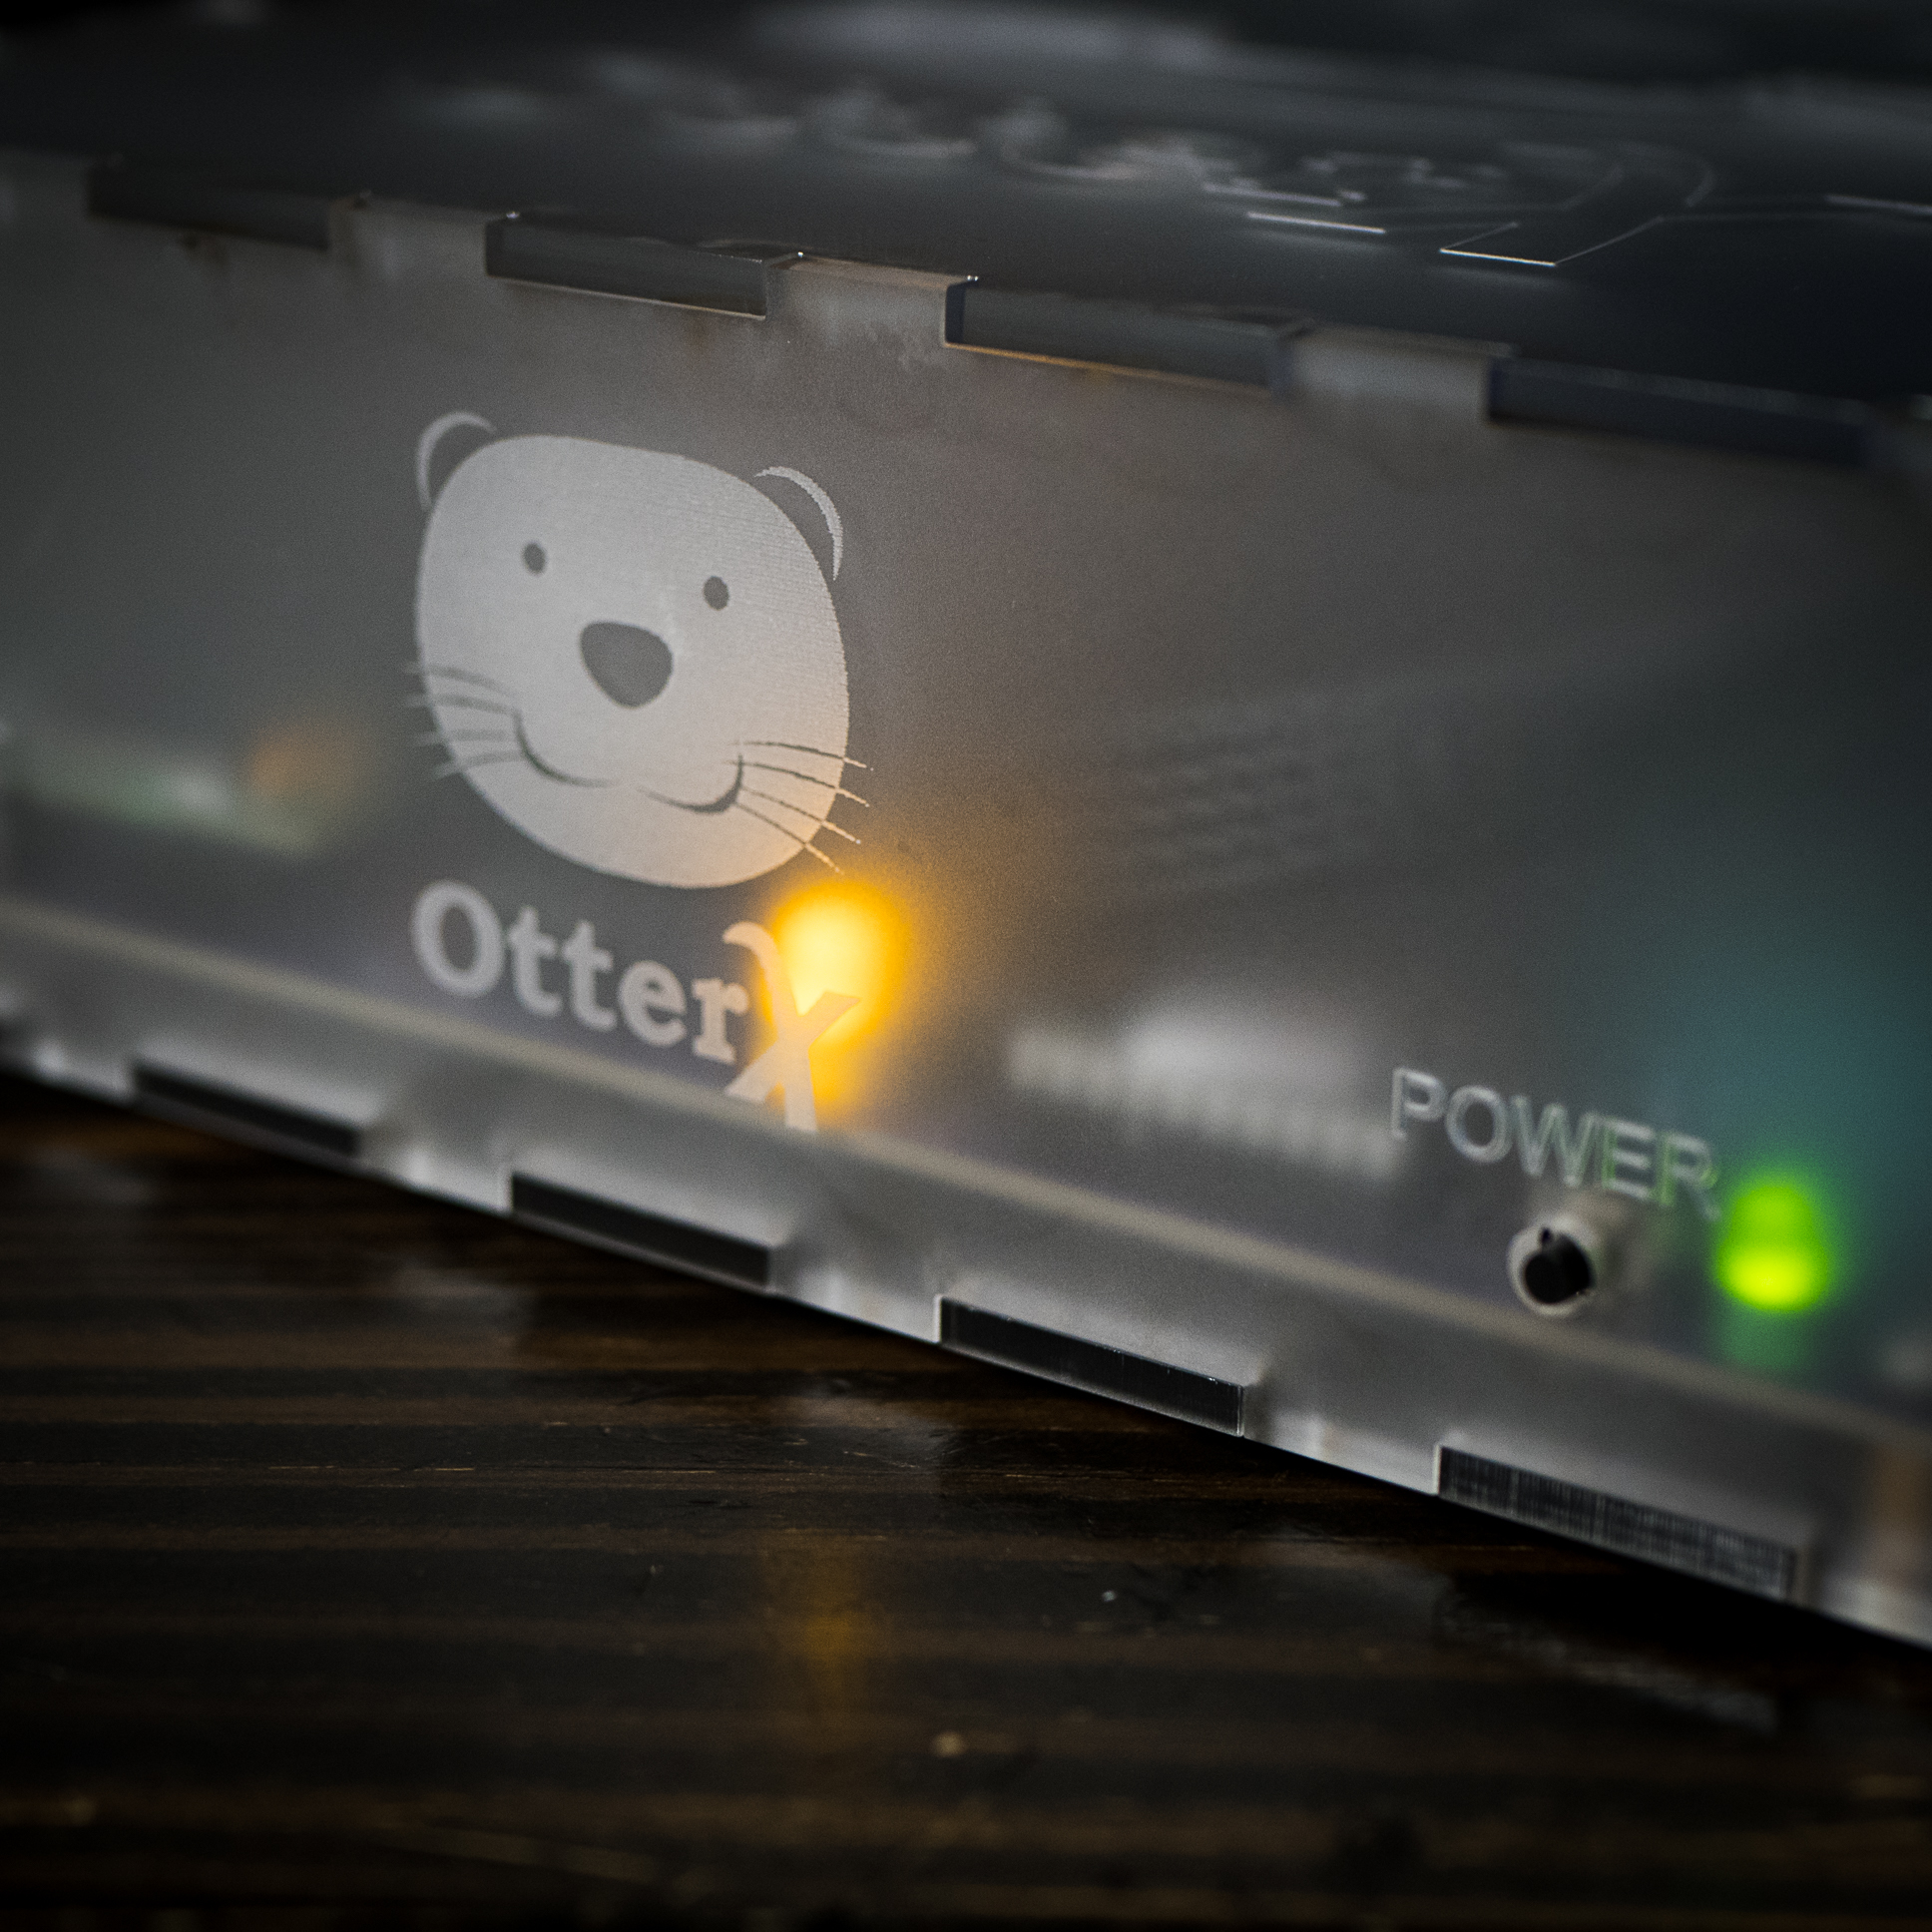
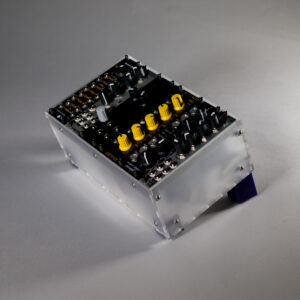
The OtterX Case
Though we deal in Eurorack mostly, I also tend to dabble in chiptunes with my band alongside my Eurorack. In fact our first album was chiptunes with surf guitar and used a real NES, GameBoy and other chiptune chips and synths alongside raging surf guitar. And of course my own WaveBoy was inspired by the GameBoy’s lo-fi wave output (which I am still working on and do still plan on releasing).
So it shouldn’t be too much of a shock that I have been following the Commander X16, a modern 8-bit computer which is sort of a modern successor to the Commodore VIC-20. In fact I’ve been writing a tracker for it and I own one of the early (and signed!) X16 Developer edition boards!
Recently, a member of the X16 community, Wavicle, has been working on a Mini ITX variant called the Otter X. It only has one expansion slot but is compatible with the X16 and is available as a kit. I grabbed one up and decided to use the holiday break to assemble it. Since I laser cut Eurorack cases, I thought why not try to make one for the Otter X too! And so I did!
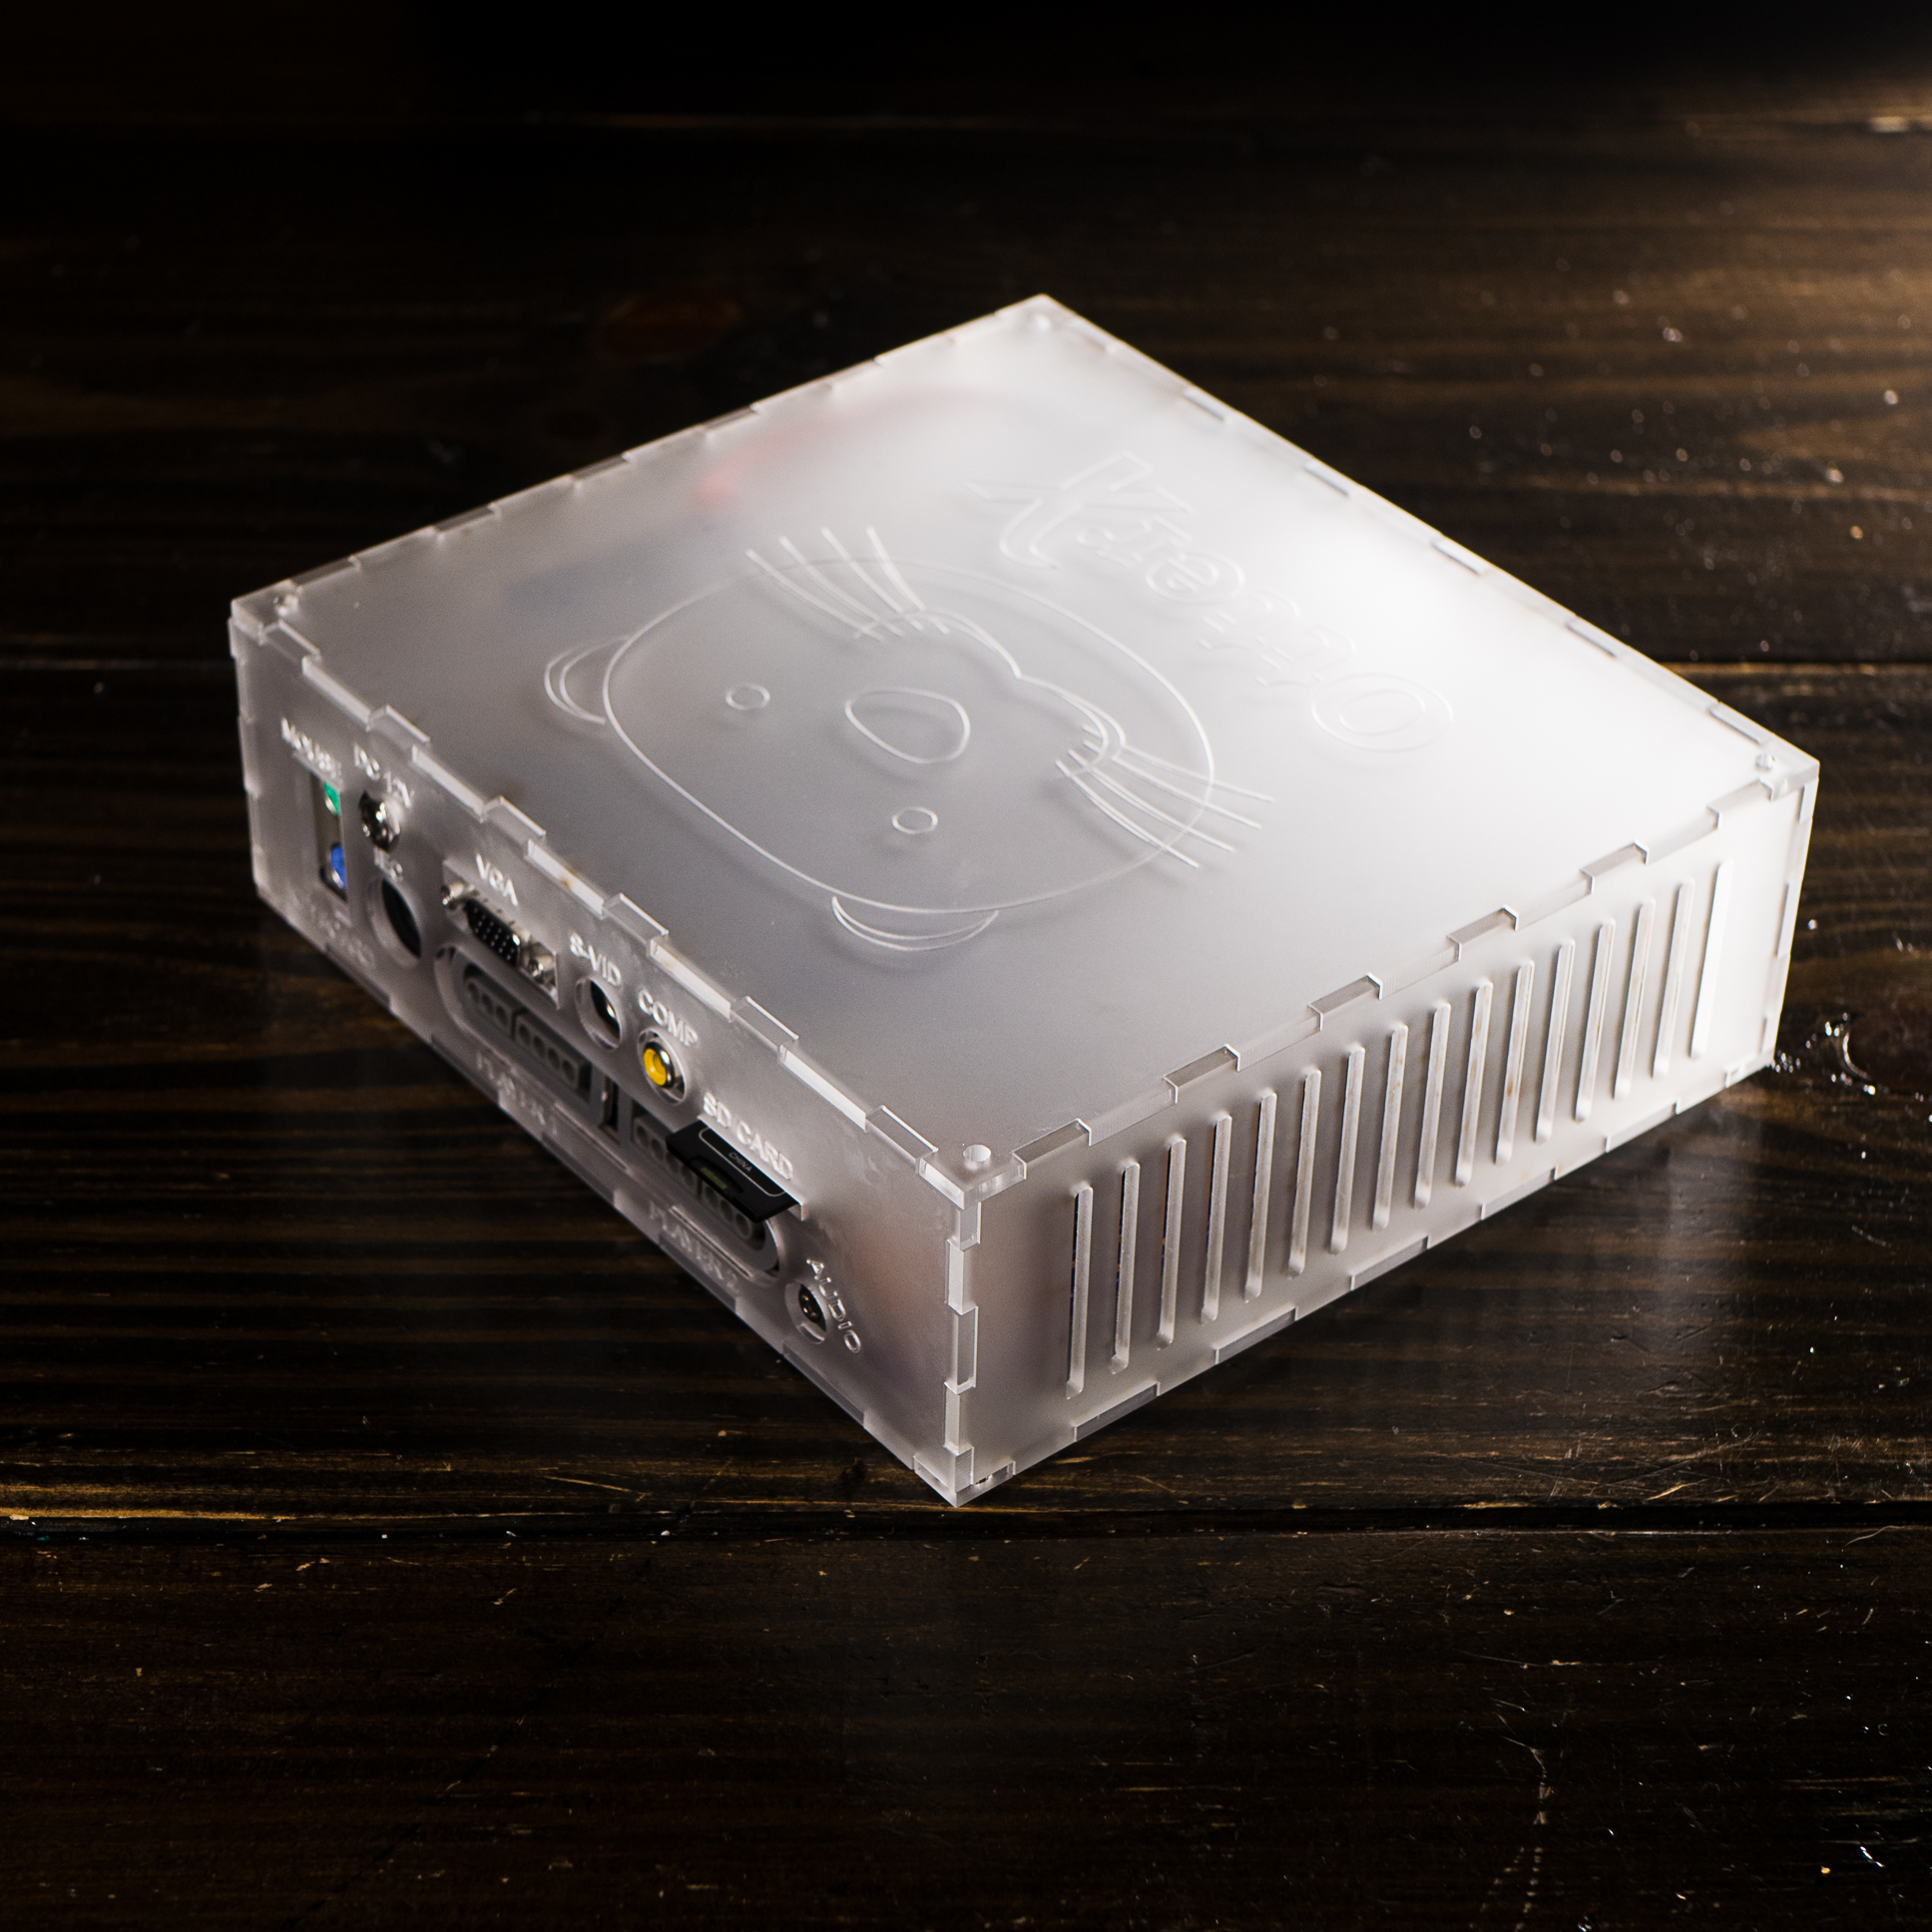
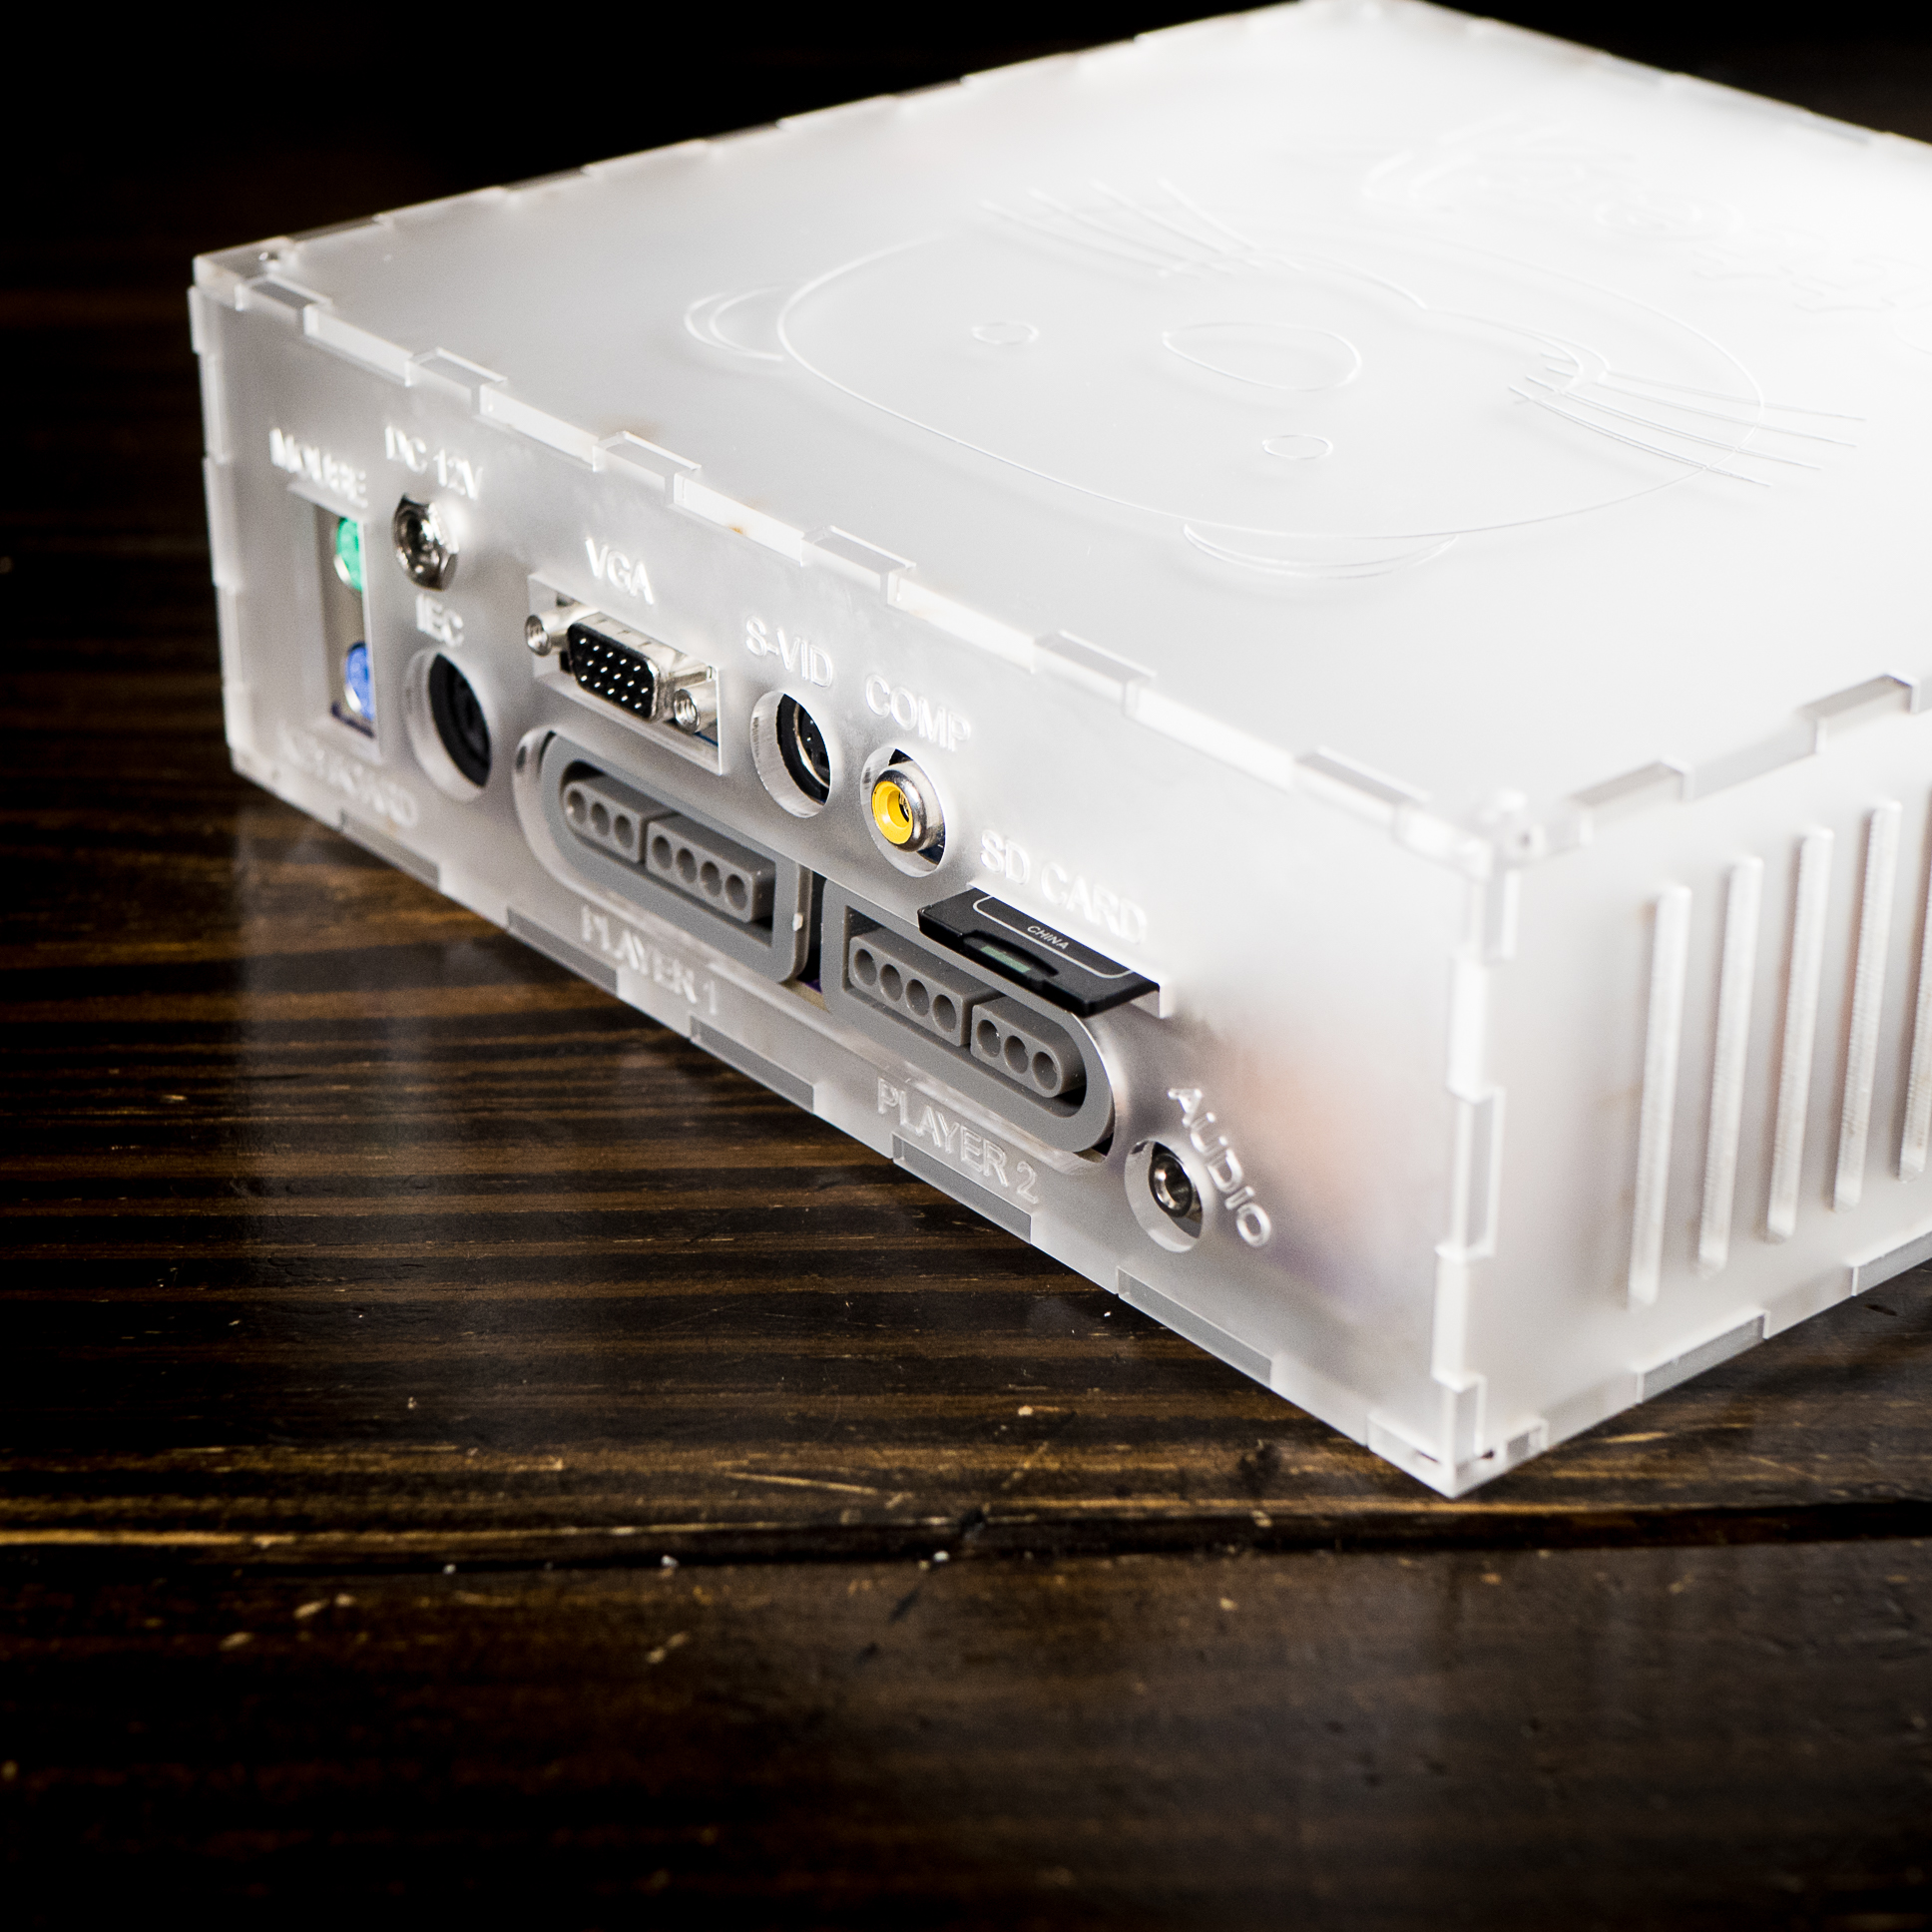
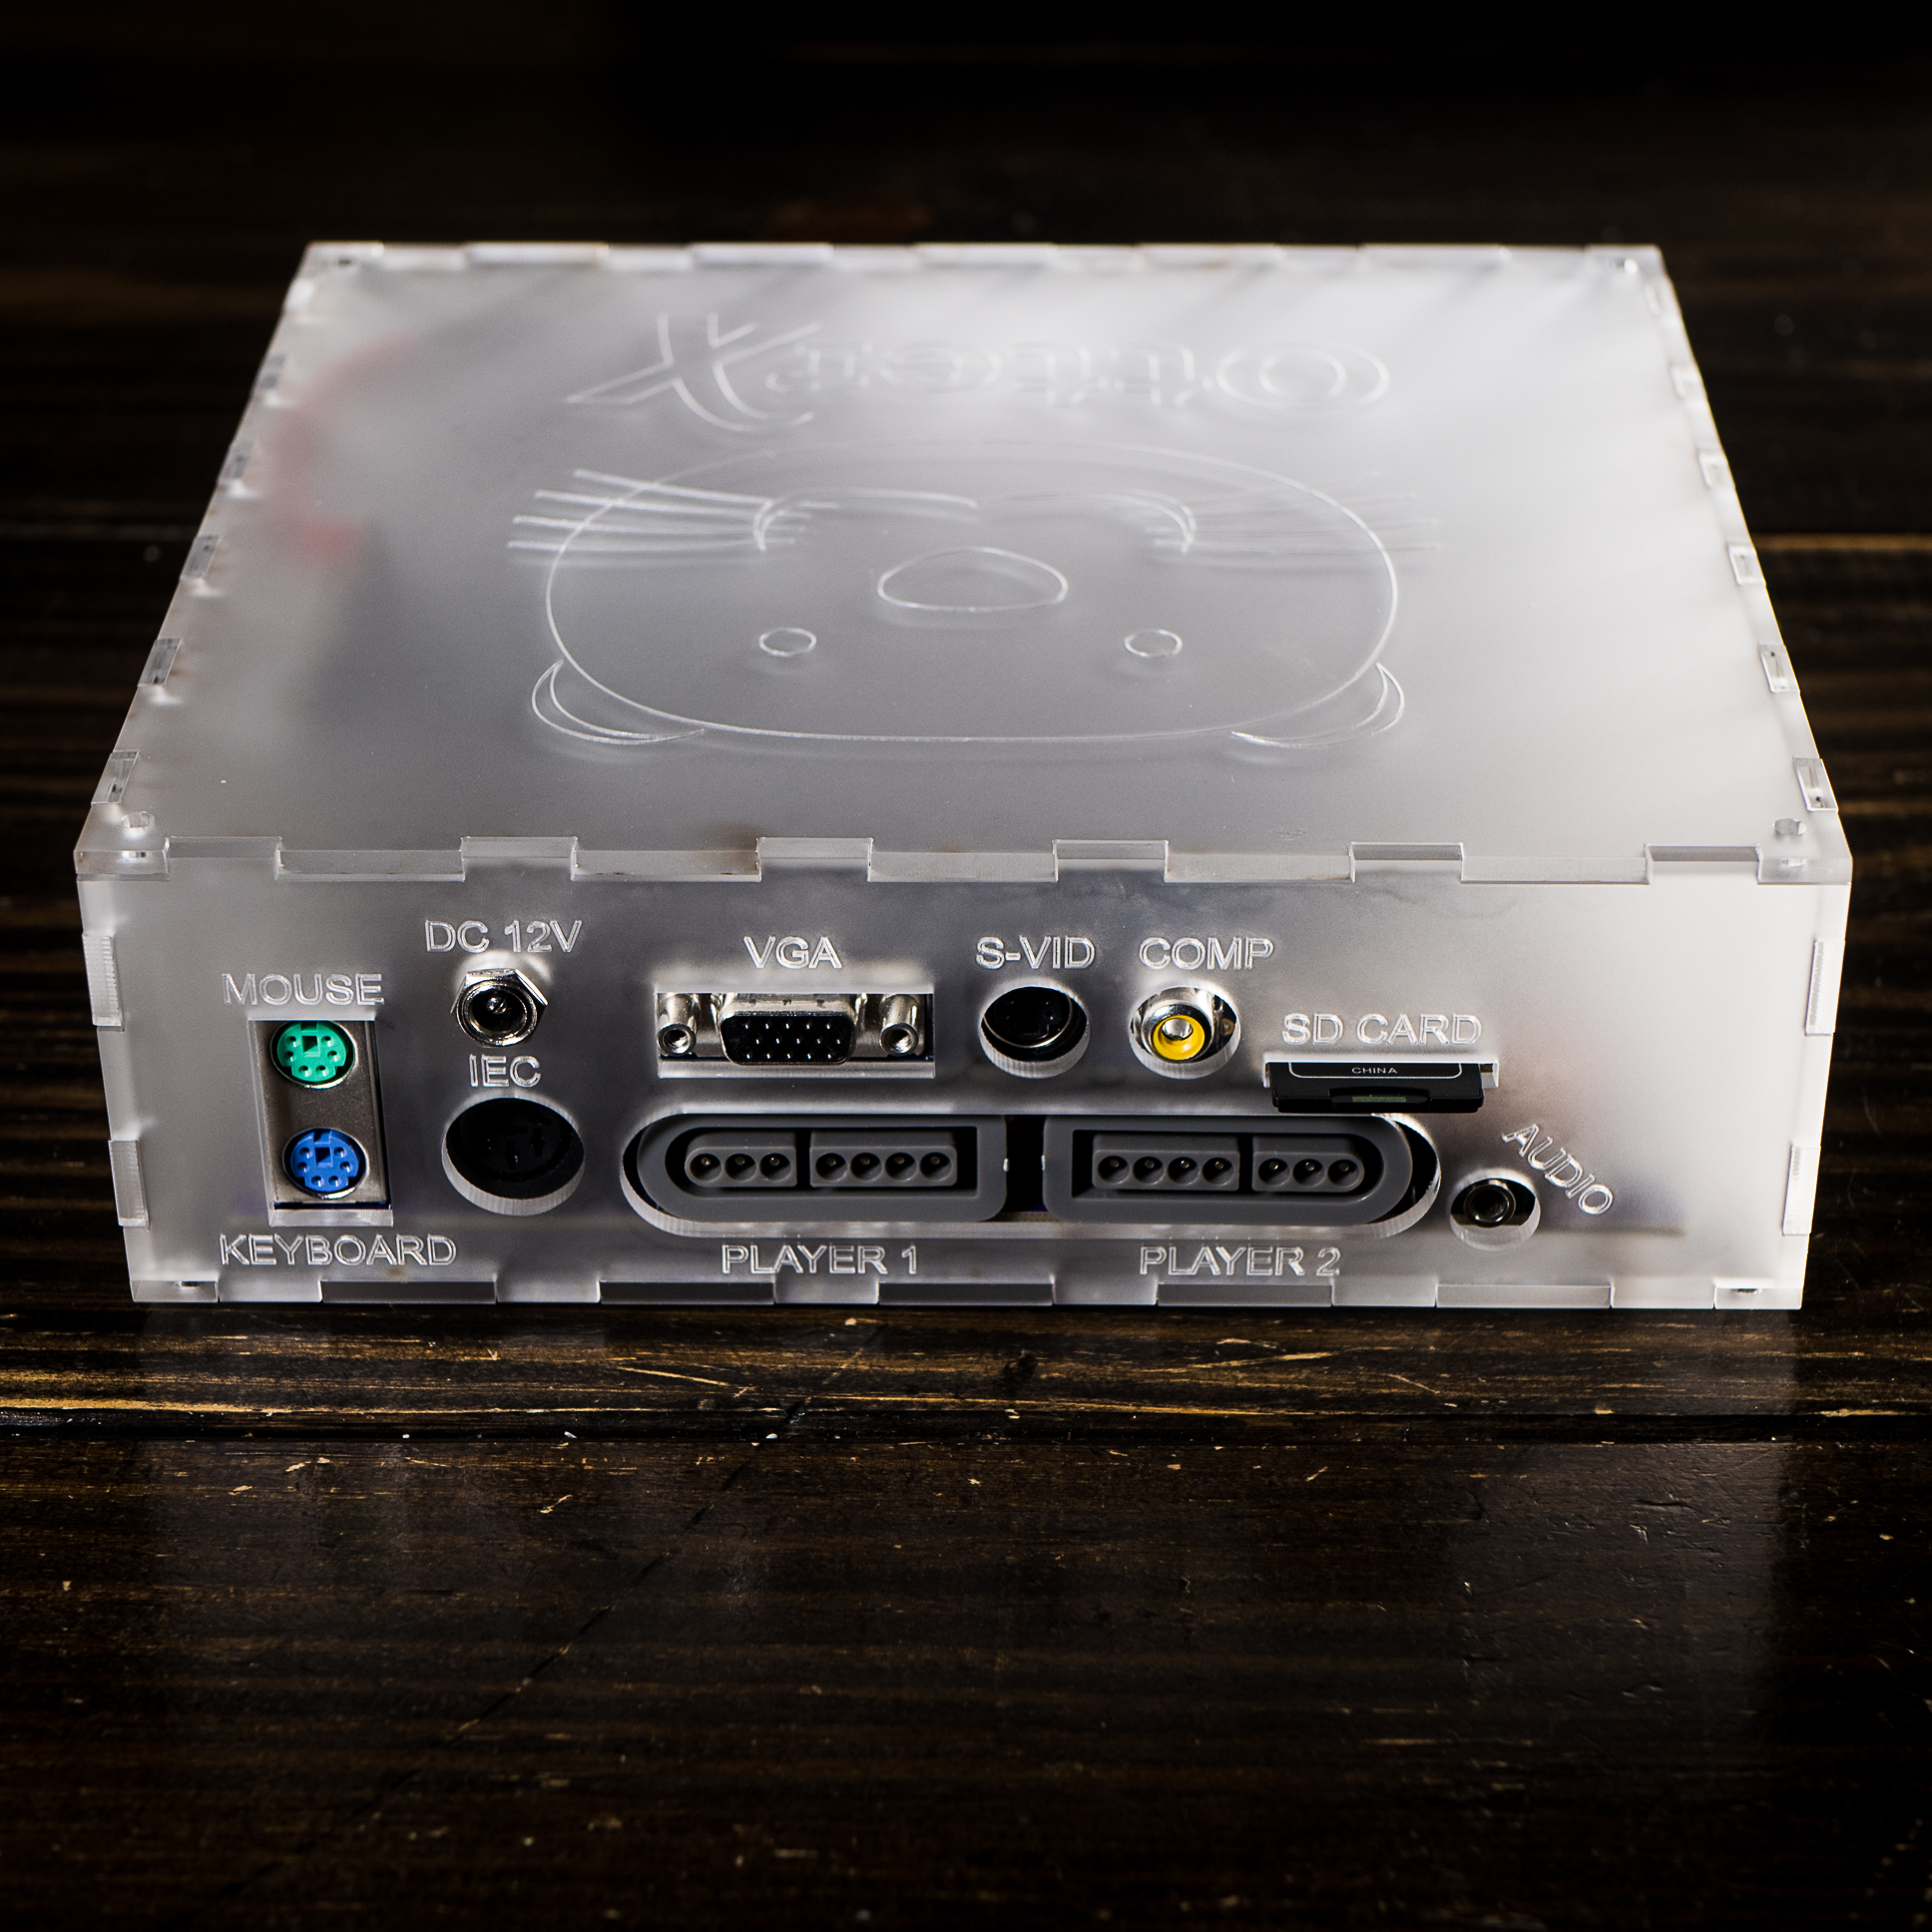
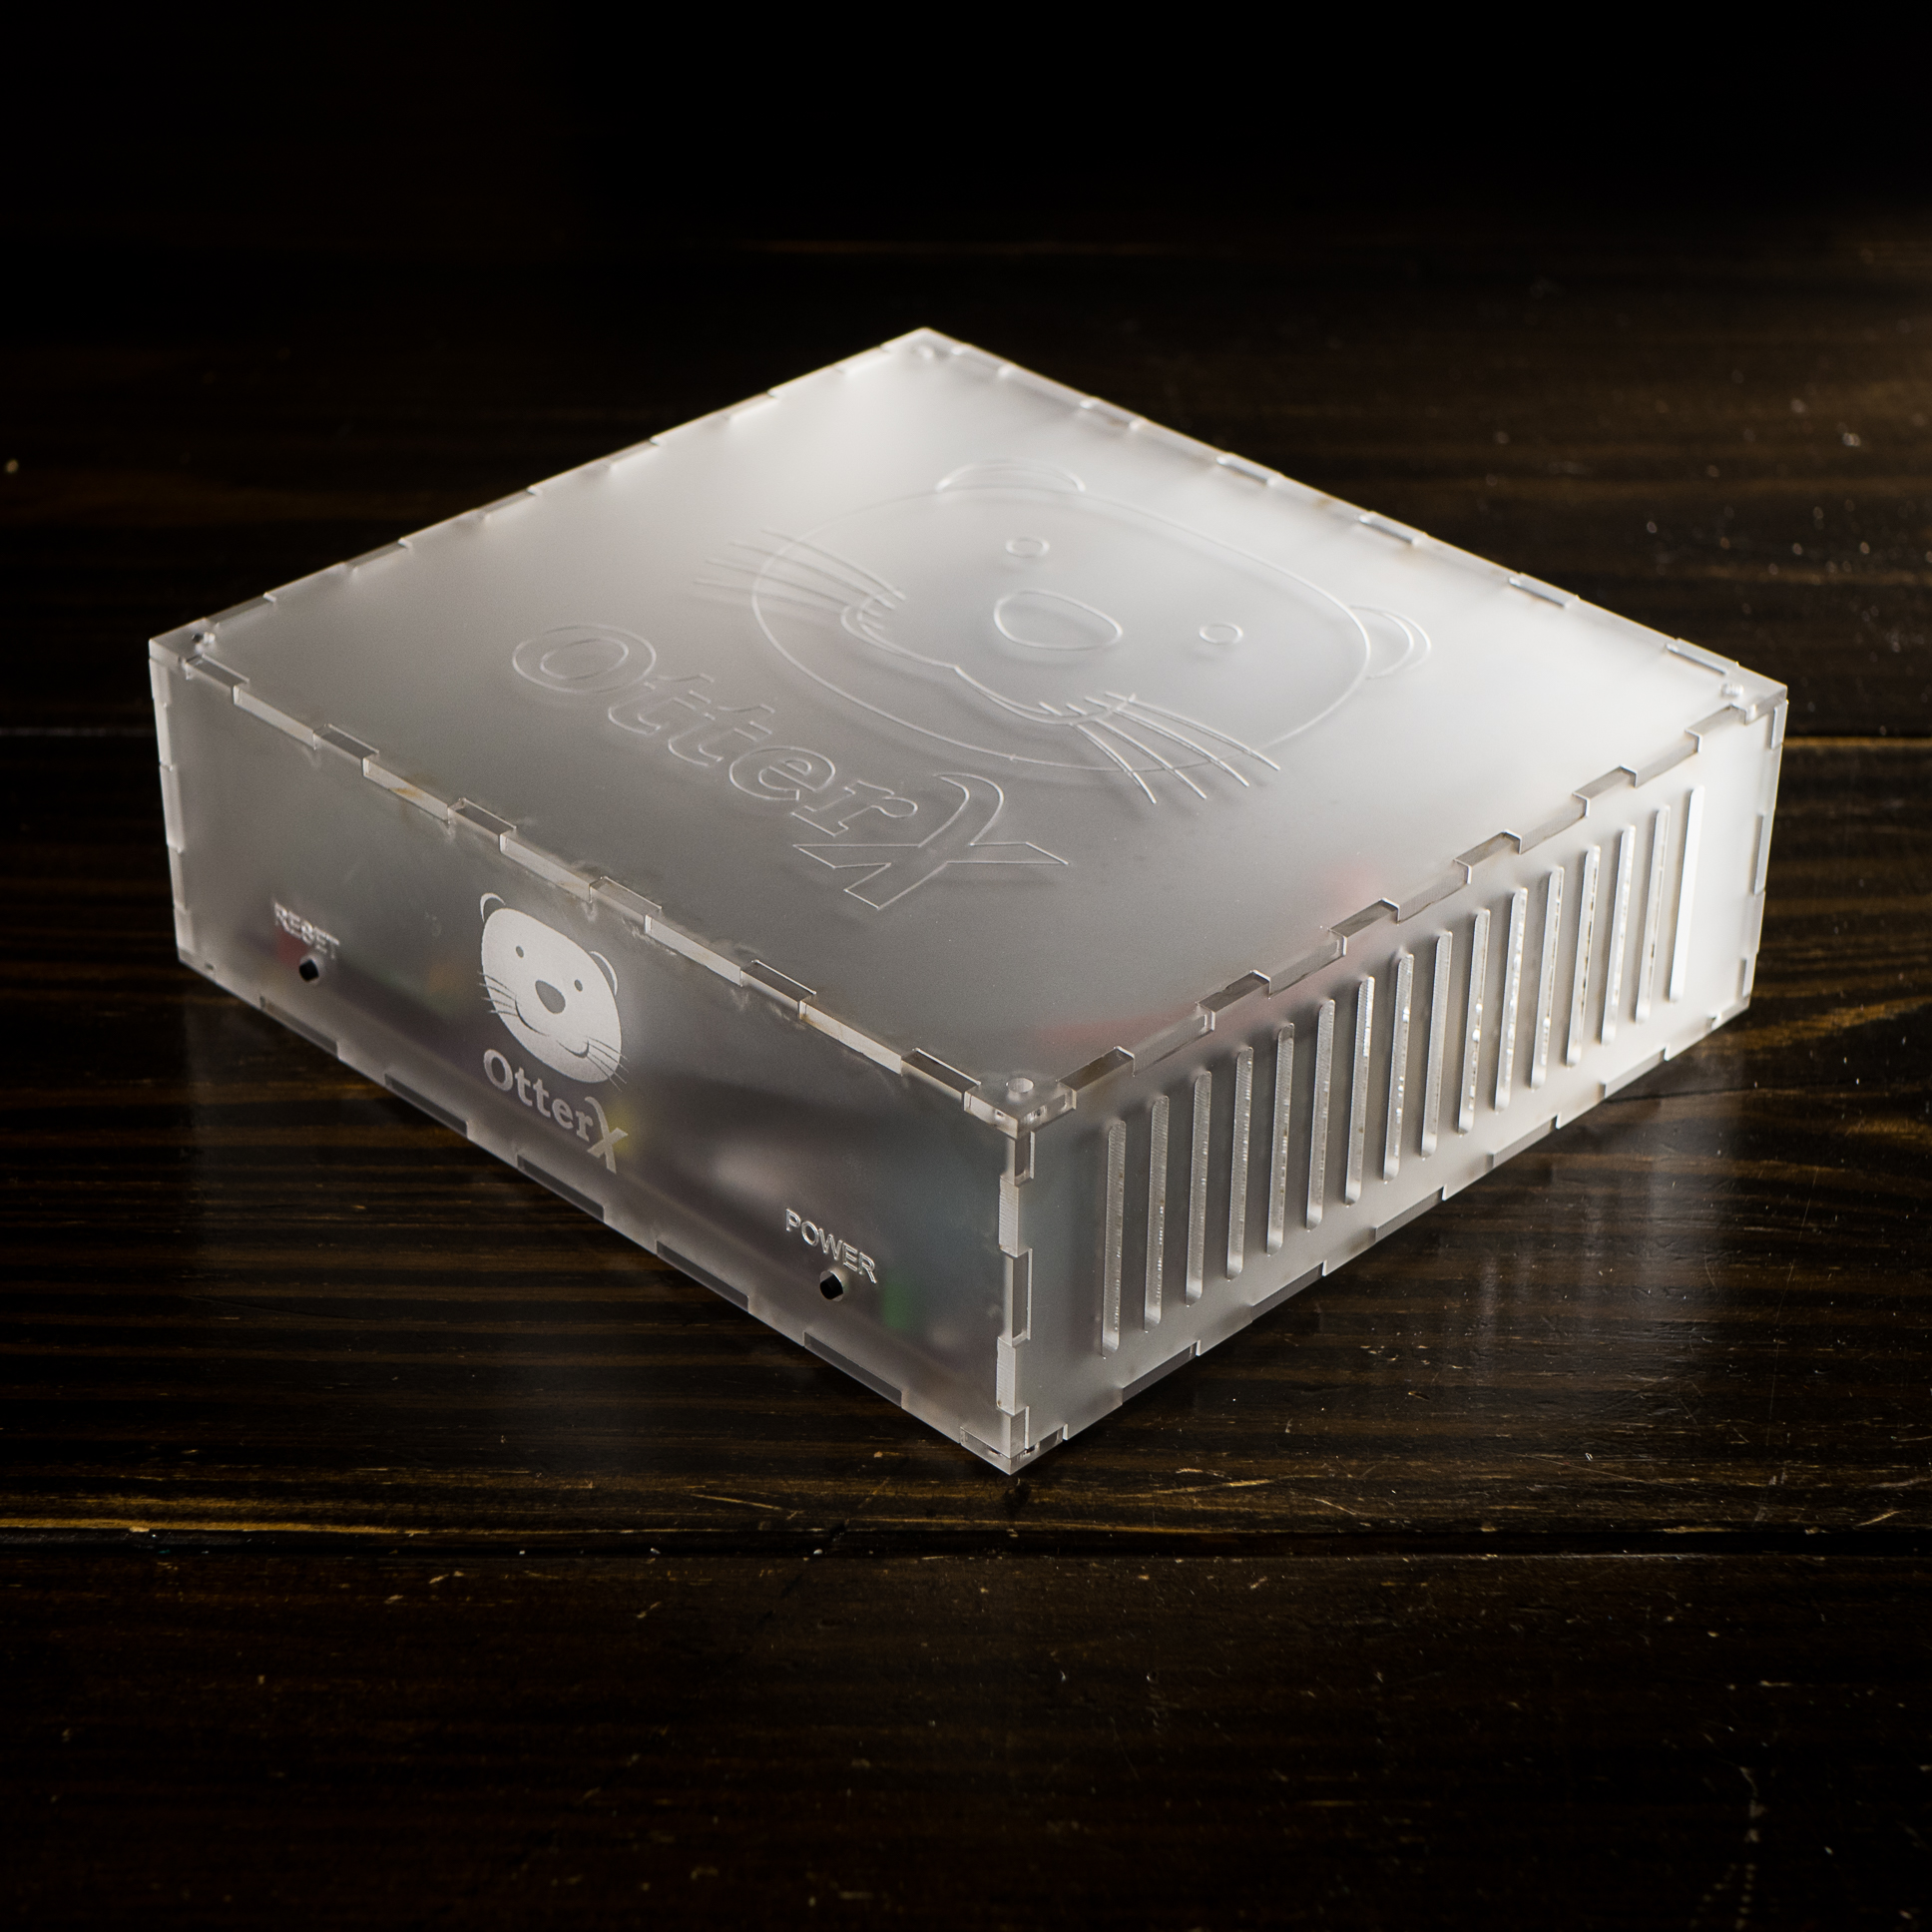

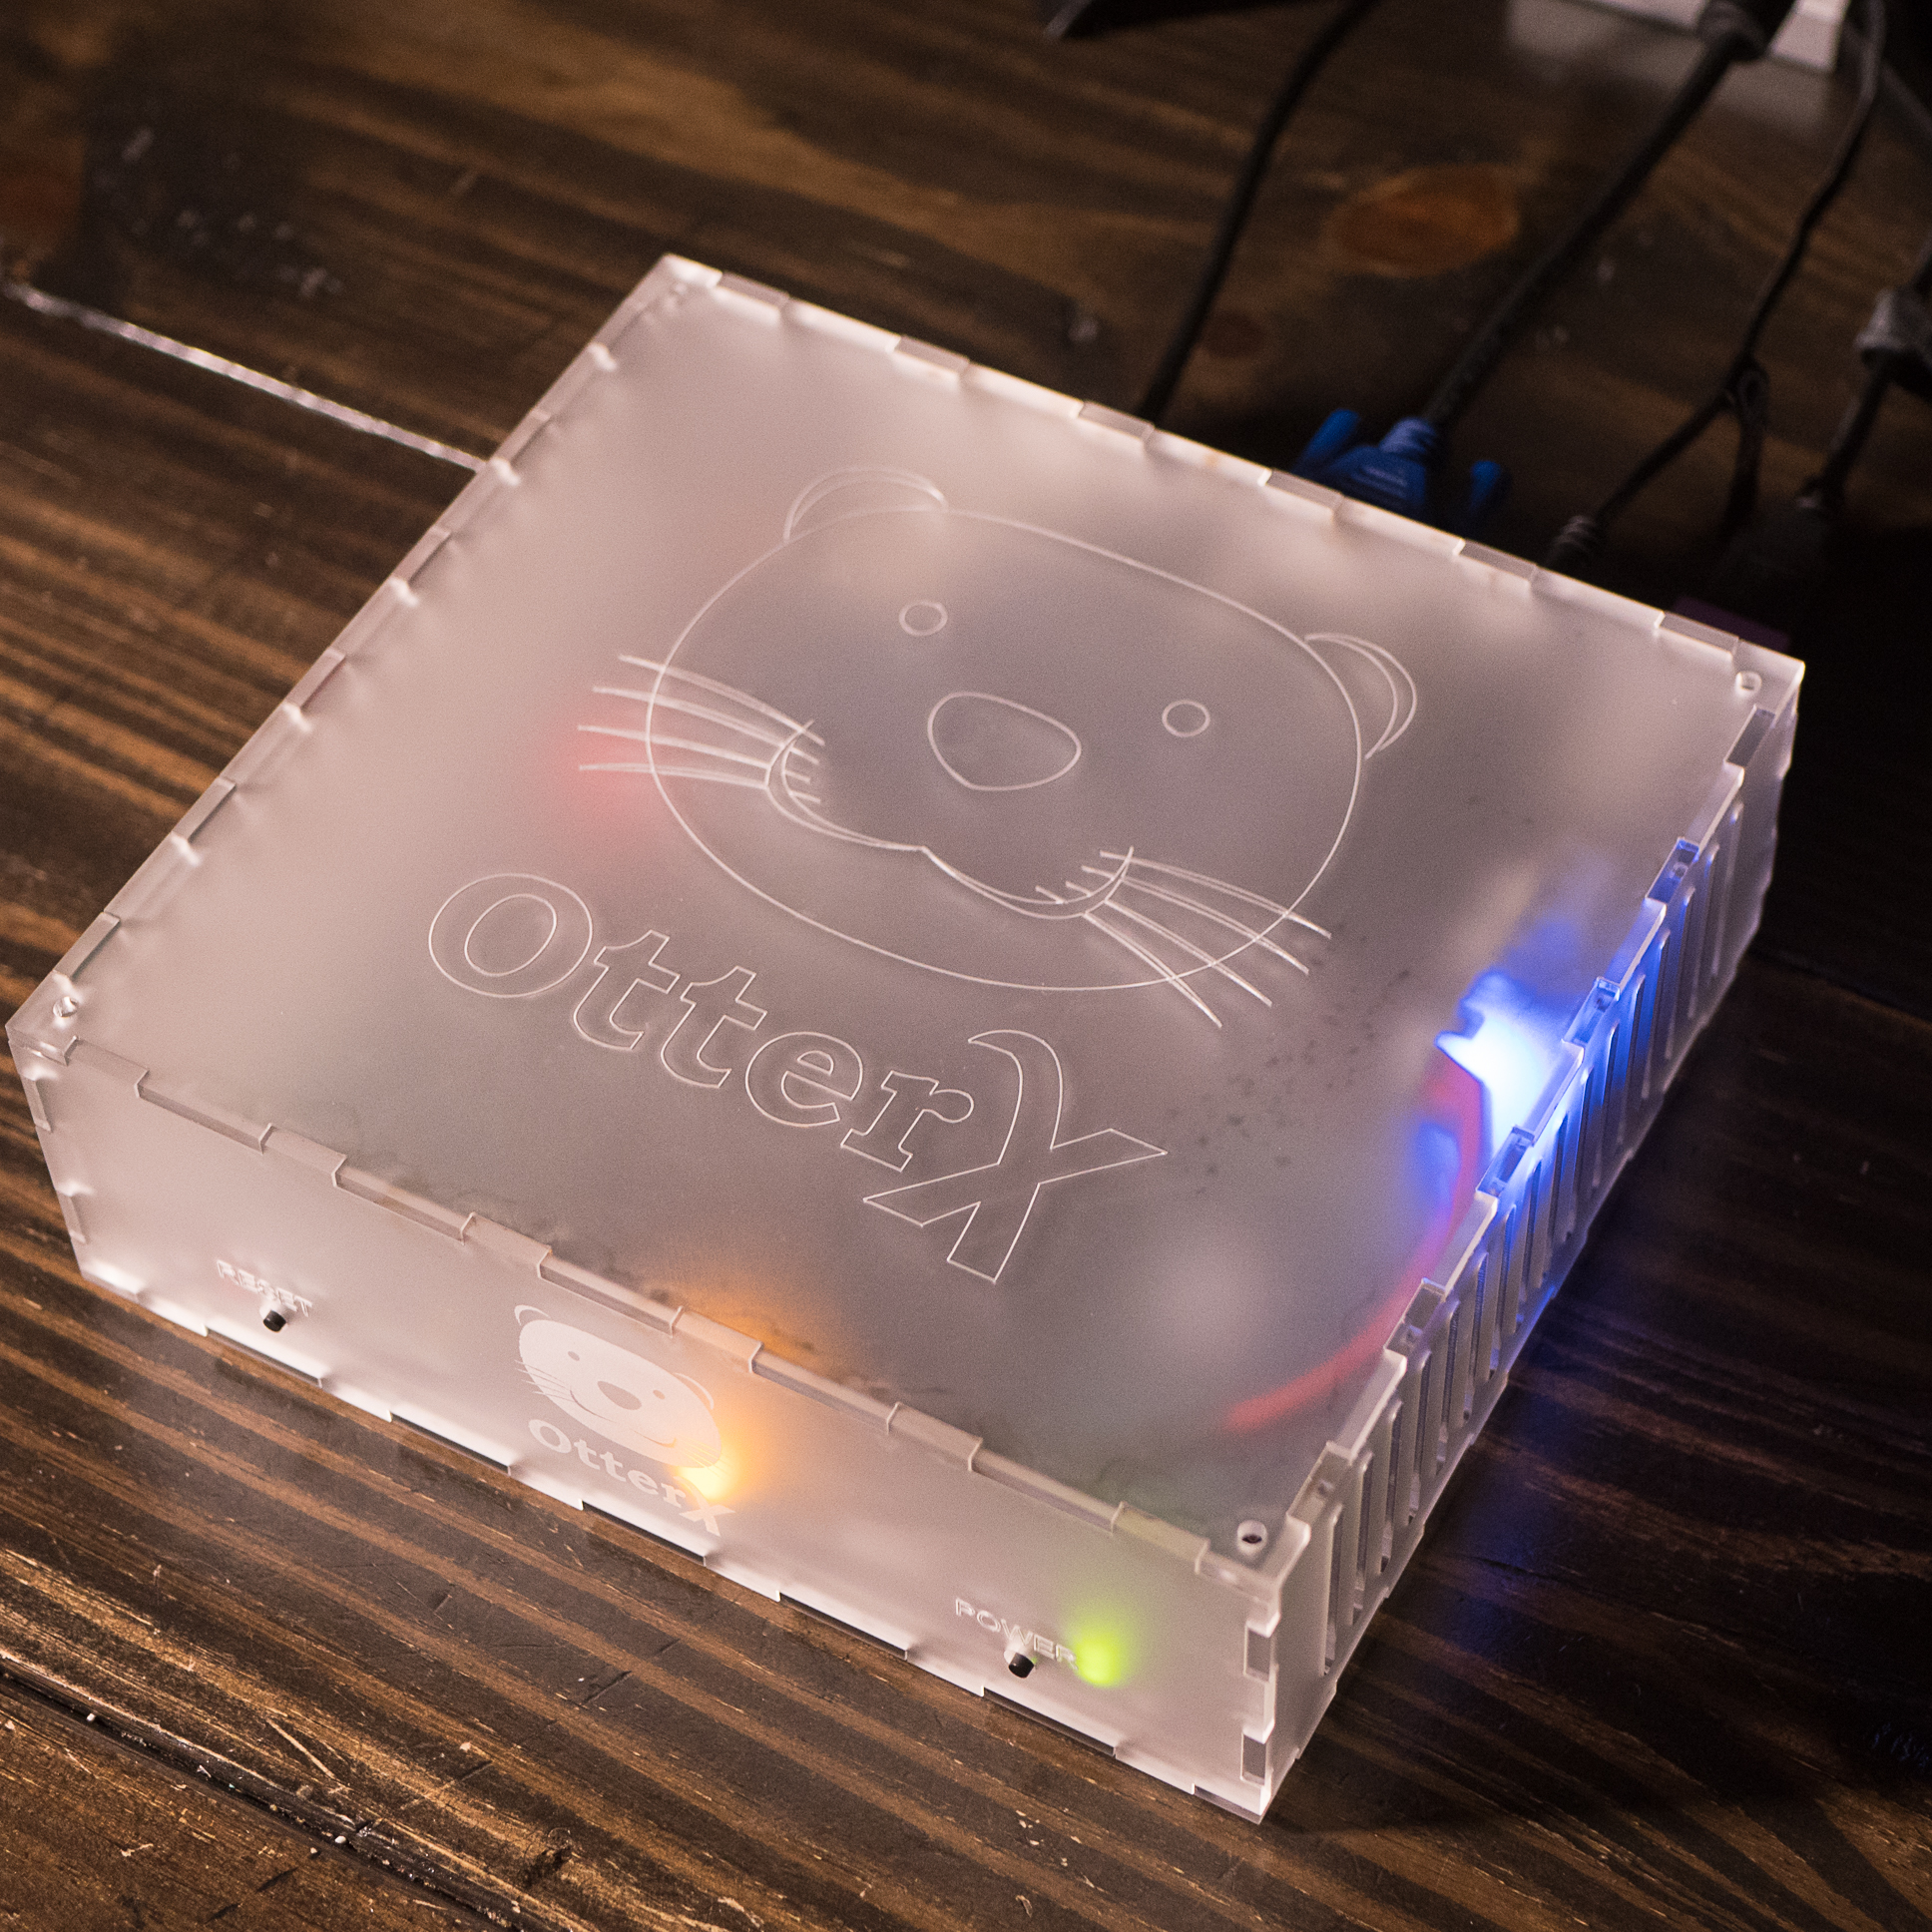
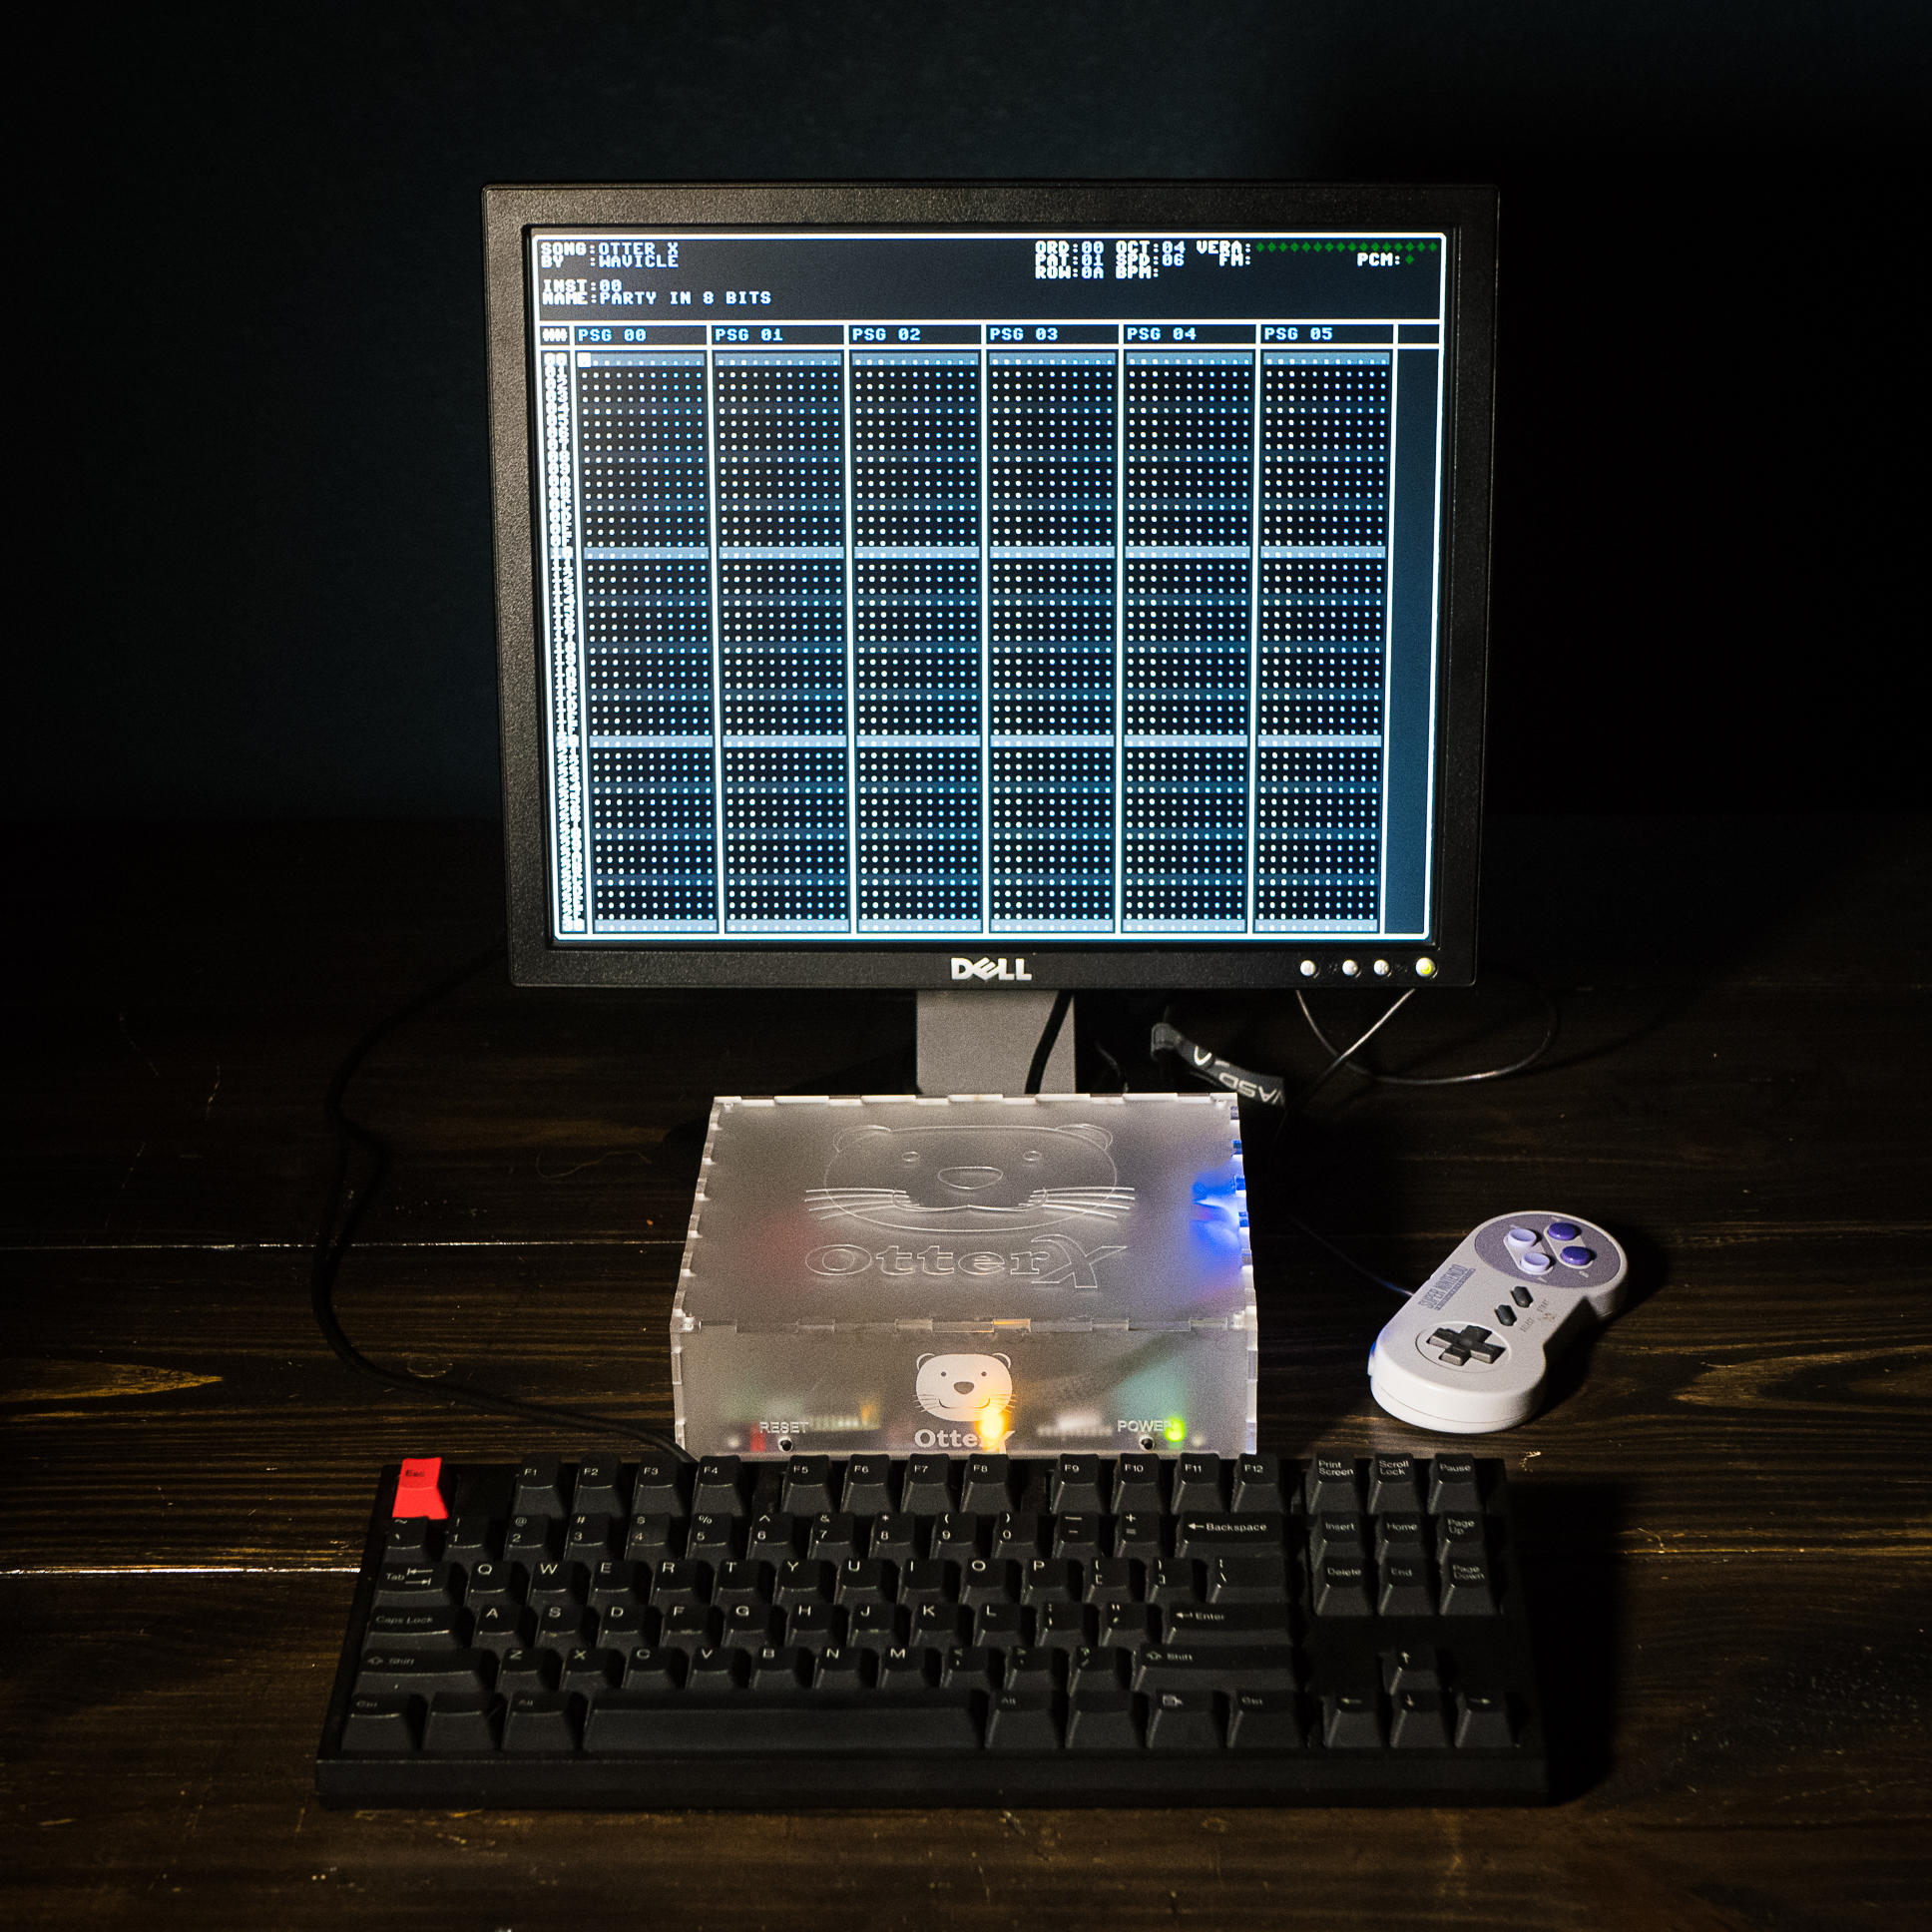
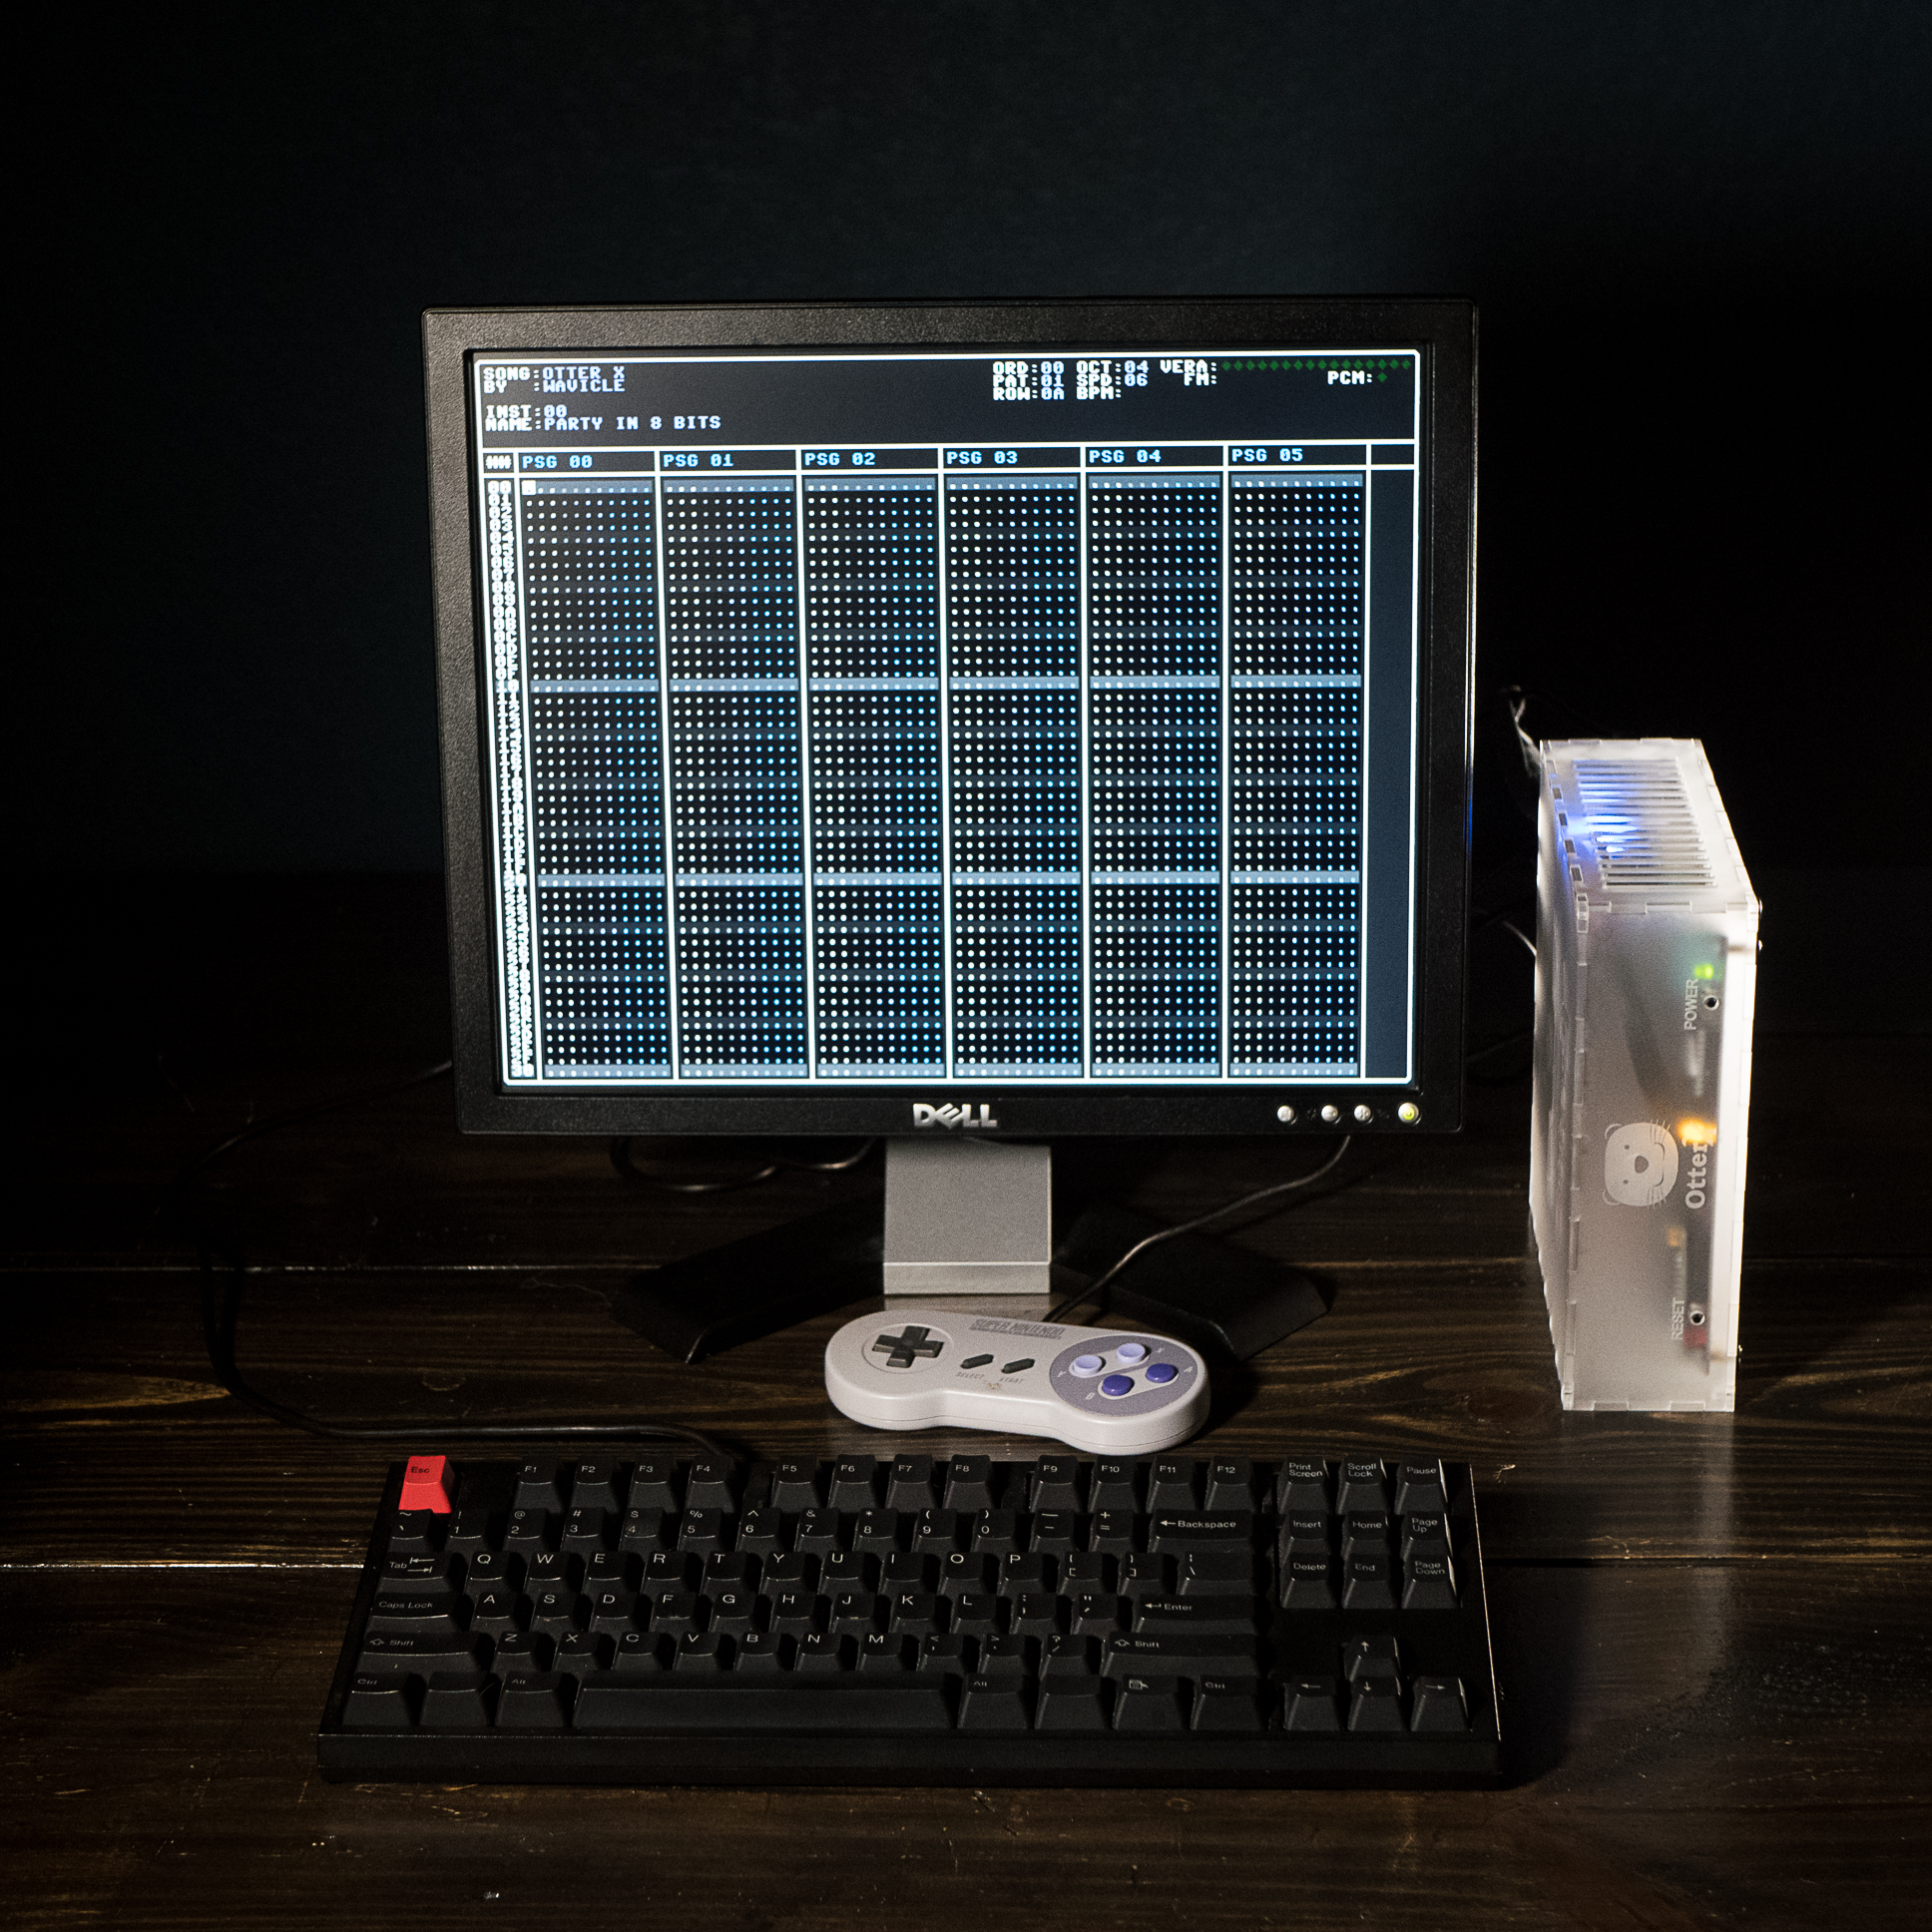
Just like our Eurorack cases, the OtterX case can be made from acrylic, hardwoods, Finnish birch plywood, and MDF. This is still a prototype/beta while I wait on testing a few combinations of parts (such as a lower profile Pico PSU to make the case a bit less tall optionally, as well as perhaps a 3D printed solution for the internal standoffs to keep the case together). I expect it will be finalized soon.
I will make the design open source under a non-commercial license as well for folks that want to cut their own. Those that don’t own a laser cutter will be able to get the cases from me directly as well. If you’re not familiar with the X16, though it’s certainly not Eurorack, it’s worth taking a look! The sound solution in particular is somewhat unique, which is one of the main reasons I’ve been following and participating in the project.
Export this to be available in early 2024. If you’d like to get on the pre-order list just use our Contact Us form. And on the Eurorack front expect more case designs! 2024 is going to be finally the year of 84HP cases from us, I can just feel it!
Speed Building a Skiffy 648
I decided to record a test assembly for a semi custom Skiffy 648. I needed to do a fit test anyway so thought it would be fun to turn it into a fast forward speed build!
Introducing Acrylic Options!
And the return of birch! I finally found a supplier that provides Finnish birch. Previously I was only able to find Russian birch. And look I’m not saying there aren’t good people in Russia, perhaps that make fantastic birch plywood. I just don’t feel right about possibly doing anything that might help Russia do what they’re currently doing. And I’ll leave it at that. Fortunately, after over a year there is now an alternative so expect birch to come back as an alternative to MDF for most of the cases. And of course I will continue my Hardwood Editions for folks that want a premium hardwood case.
But for now, let’s talk about acrylic!
Meet the Skiffy 42 Acrylic Edition! This was made using recycled frosted acrylic and Starry Night for the plastics (my favorite color). I’m super excited about these and honestly I’m not quite sure why I waited so long to try making an acrylic case. Folks have been asking for them. Part of the issue was finding a good supplier but I also wanted to focus on having more case designs too. Or at least that’s my excuse 🙂
Acrylic is more expensive than MDF or Birch. It sits in between Birch and the hardwoods and this is reflective in the cost. But it is quite a stunning look! I do plan on offering more colors. I think translucent red acrylic panels with black plastics would look really awesome for instance! So expect more options to follow soon!
For now the Skiffy 16 and Skiffy 42 are available as Acrylic Editions but I hope to offer most of my cases in acrylic. The X-series, since it is meant to stack, will require some additional testing but I think all the Skiffy designs should be pretty well good to go. If you had a case in mind you wanted that isn’t available in acrylic yet, just let me know!
1U/Tile Options Coming Soon
I’ve have a few requests lately fro having some 1U/Tile options. This is something I have been wanting to do but wanted to make sure my double-row rails worked as expected. As there are now several Skiffy 642 cases in the hands of customers, I’m not feeling fairly comfortable with exploring Tiles options more.
Here is a mockup of what I would call a Skiffy 742:
That’s getting to be a bit comically tall so I suspect I will probably offer Skiffy 748, 756, etc. as normal options instead. I also would like to offer Skiffy 442, 456, etc. as well as have an option for the X series. At any rate, these are coming! I’m not sure when but hopefully soon!
Improving the GB Wave Step Sequencer
I’ve been hard at work adding features to my GameBoy Wave Oscillator module. It still needs a cool name. I originally called it GAVE (GB + Wave) but I think I can do better. At any rate, I’ve now nearly rewritten the codebase almost from scratch while switching over to C++. There were some bumps but it has vastly simplified things. Oddly my approach with C++ feels not too dissimilar to how I organize 6502 assembly programs (for the Commander X16 music tracker I’m writing, but that’s a blog for another day).
This has allowed me to add some nice features rather quickly. The step sequencer now has 4 modes: forward, backward, ping-ping, and random. The position of the step sequencer (as well as the edit position for adjusting the waveform manually) are now part of the main display. The default step sequence setting is stored within each patch as well.
There are still some features I want to add but I think the module is nearly ready as a minimum viable product, at least to folks that might not mind editing text files to mess around with waves. I want to have a means to generate waves using parameters via Python scripts initially and then plan to add that into the module directly, though I’ll want a better in-module patch UI first.
I plan on building at least one more prototype, in part so I can have two of these in my own rack, giving me 2 step sequences but also letting me do weirdo things with detune and/or using one as a dedicated step sequencer while using the other for audio (and a mix of both).
Significant Update to the GameBoy Wave Module
I’ve been working on a big update to my GameBoy Wave module and finally have it in a state where I can tease a short demo:
A brief overview of the module itself, it implements a similar solution to the Nintendo GameBoy’s wave channel. It uses 4-bit/32-slot waveforms which are output through a variable clocked DAC. By varying the speed the waveform is run through the DAC, the pitch can be changed. This produces a gritty sound with all sorts of aliasing and is exactly what I wanted – a gritty chiptune style module which sounds very close to the original GameBoy’s wave channel. As it should since it’s doing quite nearly the same thing.
This version swaps out most through hole components for surface-mount ones. I was averse to doing that but wanted to keep the form factor the same while adding a step sequencer, and SD card, and swapping the left/right buttons for an encoder. I would still like a through hole version so it’s easier for folks to build on their own without needing SMD experience, but I wanted to test the new features first. A through-hole version is likely to be more expensive as well.
The step sequencer uses the same wave being displayed and is updated via a trigger and has its own dedicated output. That means the audio and step sequencer can be used at the same time. Currently it only goes forwards but I plan to add more options (reverse, perhaps ping-pong, random, etc.).
The SD card is hidden along the back. In hindsight that might annoy folks that want to mess with patches off the SD card often, but I really don’t like the front mounted card slots. The SD card is used for both patches and the config. Both are just text files that can be edited in a text editor or generated from something like Python. I did this so I could more easily work on the wave generation functions external to the module first, and can then port the code over to the module itself (where I’d also need to add the GUI elements). The plan is to be able to generate frames just like you can in LSDJ using parameters like amplitude, filter, clipping vs wrapping, etc.
As alluded to above, I plan on selling this though it is also open source, though I need to clean the repository up a bit as it’s gotten pretty messy with working on all the features and the through-hole and SMD designs. I’m not sure if I’ll sell complete modules, kits, bare boards, or what but I want to give as many options as I can so folks aren’t forced into building one on their own if they don’t want.
Still more work to do on the software front too but I’m very happy with the hardware and the software has most of the core functionality I wanted for the module.