Posted on

SkiffyPower

I get asked somewhat regularly about why we don’t offer power supplies with our cases. It’s not because we haven’t wanted to! It’s because a fully built power supply requires certifications, tests, and acceptance of risk. We find the 4HP power options to be suitable for most applications, although essentially all of these supplies are using tiny switching power modules. These are both flexible and, properly designed, easily good for audio application. But they can be a bit pricey.

Recently, I decided to look into if I could make a power supply as a kit. It would be based on a pretty standard bipolar linear supply. I’ve actually already designed an active bus board, meaning a lot of work I have already done.

Active bus board

The bus board expects a bipolar DC supply. In my case, this comes from an external linear unregulated supply. The unregulated supply requires AC mains voltage and isn’t suitable as a kit, though for those curious, I am happy to share the design.

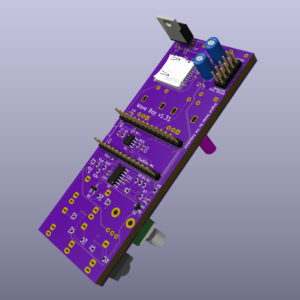
I have a design I’m pretty happy with in the bus board, so all I need to do is figure out how to come up with the -/+ 15V or so needed to feed the circuit. It took looks of circuit sims and calculators and things, but I ended up coming up with this:

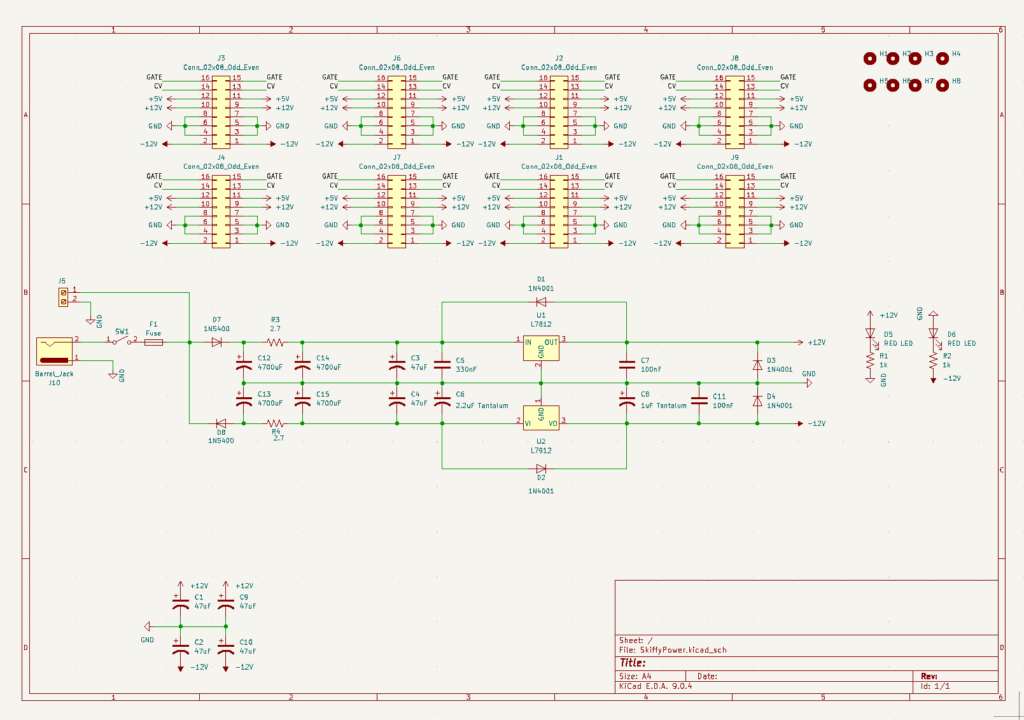
It is mostly the same as my active bus board except it has a barrel jack to provide 24VAC which is then half-wave rectified and filtered to feed the linear regulators. This includes an RC filter which actually I don’t think is strictly needed, though this has the added benefit of dropping the voltage as the load goes up which has an added bonus of requiring less heat dissipation for the regulators.

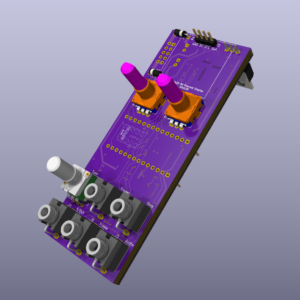
I designed it to provide around 500mA or so, which is plenty for say the Skiffy 42 minus edge cases where some power hungry modules are being used. It may not be enough for the Skiffy 642. That is why I added a screw terminal though. With the power AC supply, two boards can be linked together to share the same AC input.

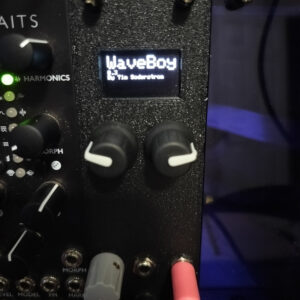
I still need to design the PCB, test it in the real world, among other things. But this could be a design we are able to offer as an option for some of our cases. It is not a design that can scale up to huge power hungry racks, but that wasn’t really the point of this particular design. Also of note is that it does not provide +5V by itself. I was thinking of making a smaller board that could be plugged into one of the 16-pin connectors for that. The reason being, nearly all modern modules that need +5V seem to generate it themselves. That is what we do for our first module, the WaveBoy. If it’s rarely used, it makes sense to save on the part count for the default use case.

It remains to be seen if we’ll end up doing this. If you have thoughts or opinions, do let us know! We’d love to hear from you!

– Tim

Posted on

SonicState Featured the WaveBoy In An Article!

I am just floored! Paulee, one of the frequent contributors to Sonicstate asked me for an interview about the WaveBoy. So of course I said yes and the article just came out this morning! It even hit the front page! I never thought our tiny synth company would have made something as prestigious as Sonicstate. It was an incredible experience. Of course I recommend folks give it a read as it covers some of the history and design decisions I made. Sonicstate in general, for those that don’t already read the web publication or listen to the podcast and watch their video content, has some great content. It’s one of my go-tos for synthesizer info and I recommend it! Not just because we’re featured, but that was an incredible honor for us!

Sincere and deep thanks for interviewing us, but also for being such a good source of synthesizer news and information! Thanks also to Paulee! Of note in addition to their Sonicstate work, they also have a YouTube channel that covers some great content. I learned a ton of information about the Amiga soundchip for instance. I had no idea it was as flexible as it is or that there were a lot of audio applications for Amigas. I kinda just thought Soundtracker was the thing. A bit of shame on me given I grew up on trackers and the Demoscene.

For folks interested in the WaveBoy, it’s available now as both a fully assembled version as well as a kit. They are made to order and given the above article, we may be busy cranking a lot of these out. So thanks for your patience while we work to build all these!

Posted on

WaveBoy 0.57 Firmware Released!

I missed writing about 0.56, oops! So I’ll mention the new features from both:

  • Save States
  • Wave Mode Dual Audio Output Option
  • Auto-Screenaver
  • Pitch Knob Range Configurable
  • Bufixes with tuning, UI

If upgrading from 0.55, folks will need to grab the updated SD card image for the update config.txt. Upgrading from 0.56 to 0.57 does not require any changes, as the firmware will attempt to update things as needed. The wave patch format changed slightly and will get updated when saving a wave patch.

All these features are good, though the dual audio output is a standout. It replaces the Step output with a secondary audio output that follows the wave frame but can either be detuned or set to a note offset (for doing fifths or having a sub-oscillator for instance). While this does make the WaveBoy a bit less GameBoy like with this mode, it does make it more flexible and adds its own sort of color to the chiptune / 8-bit / lofi landscape. It’s very fun!

The other features are mostly quality of life improvements. The save states in particular is quite nice. WaveBoy will now save the configuration of the Volume envelopes as well as the last UI screen and mode that were used. This way you can pick up where you left off in between sessions.

Lots more features to come for sure but 0.57 really makes WaveBoy a very capable module. There are still some in stock at the time of this writing! More will be coming though with the tariff situation, our plans are a bit on hold for the moment. So if you want one, now might be the time to get one.

Posted on

ADCs and Noise

For the past week or so I’ve been spending much of my spare time trying to improve pitch tracking in WaveBoy. I made some pretty giant strides by adopting a per-note tuning approach. This works well, but it uncovered and ugly problem I haven’t noticed before – certain pitches were “noisy” when sampling from the ADC. This noise was heard as audible steps which was both unpleasing to the ear and made it hard to tune.

To improve things where I want, I suspect I will need to make another WaveBoy PCB revision to add a low-pass filter to at least the V/Oct input (and maybe the Tune input, though I’m not sure on that one). There’s noise coming from somewhere and one way to improve things is to use a low-pass filter at the ADC input. Since the V/Oct is a slow changing value (relative to audio for instance), the low-pass can be pretty low. But I need to do more work there to see.

Even without a PCB update, I was able to greatly improve things by using both hardware and software averaging. In the software case, I’m using floating-point math so I can have more precise results when averaged. While not perfect it’s pretty good. And some imperfection is kind of part of the purpose of WaveBoy anyway.

This now unblocks actual feature development again, with the next thing I want to work on being “Manipulators”. These let you manipulate the selected wave frame by a number of algorithms which allows one to build a sequence of frames much more easily and right on the module rather than having to edit a text file externally (something I know many folks found not fun).

Once I have those out, the next step is full wave generators (which may themselves manipulate the Manipulators). This will allow one to start with a basic calculated or drawn wave and produce a full set of frames with parameters. It will be very similar to the LSDJ way of doing things, something that’s always been on my list. Until recently I just wasn’t sure how to tackle that.

What does all this mean? It may mean the full production version of WaveBoy may take a little longer to produce. Not because of the Manipulators (those can be added later) but because having good pitch tracking is pretty important and if I can make that better/easier with a few minor hardware additions, I should do that.

Posted on

Next WaveBoy PCB Revision

I’ve spent the weekend off and on working on another PCB revision to WaveBoy. The next revision will use purple PCBs to make the front panel. Not many people will see it (unless folks have transluscent cases, like my acrylic ones) but it’ll help identify the board revision.

Folks that have already purchased the Pre-Release, worry not! This version doesn’t add any features though I will have to keep multiple versions of the firmware around between the revisions, though that’s no big deal.

The main change is switching up the right encoder wiring to use pin 0 instead of pin 13 for one of the encoder pins. Pin 13 is used by an on board LED on the ItsyBitsy which has to be removed for the encoder to work properly. This update avoids that extra step which makes assembly easier but doesn’t otherwise change the functionality.

Otherwise it’s minor updates: The SD card slot has been moved over so the card is easier to remove. The protection diodes are moved to the opposite side for using a keyed connector for Europower and I cleaned up a bit of a layout. After the pre-release (I have one PCB left), I will probably settle on the yellow/blue OLED displays as well as I can get those in bulk.

I plan on doing a medium run of 50 PCBs which, along with looking at some alternative suppliers, should keep the module cost lower. To say I’m a boutique Eurorack store is perhaps an understatement so while this thing would be much cheaper if I were able to make thousands, as much as I love my quirkly little module, I don’t see it getting anywhere near that adoption. If it does, that’s a great problem to solve for another day. But that does mean the cost of the module probably won’t move too much.

Posted on

WaveBoy Firmware 0.3

Here’s a quick demo of some of the new features of Firmware 0.3, including new default patches (including a wrapping Saw to get the LSDJ style wave vowel/filter sound) and 6 noise modes as well as showing what it sounds like through a filter. Wasp in this case, though I didn’t go bananas with it since I wanted to showcase sounds from the WaveBoy itself.

https://www.youtube.com/watch?v=LCqC3Gd7GWg

No talking just noise!

Posted on

Finally Updates to WaveBoy

Yesh it’s been quite some time since I worked on WaveBoy. I finally got back to working on the firmware and realized I hadn’t finished moving features over from the old (very messy) firmware to the new (much cleaner) base. So I spent a good chunk of the weekend doing that. But I did also get around to writing a Python script to generate some fun waveforms. Here’s one of them!

https://www.youtube.com/watch?v=SH5oU5W5m5o

Posted on

The OtterX Case

Though we deal in Eurorack mostly, I also tend to dabble in chiptunes with my band alongside my Eurorack. In fact our first album was chiptunes with surf guitar and used a real NES, GameBoy and other chiptune chips and synths alongside raging surf guitar. And of course my own WaveBoy was inspired by the GameBoy’s lo-fi wave output (which I am still working on and do still plan on releasing).

So it shouldn’t be too much of a shock that I have been following the Commander X16, a modern 8-bit computer which is sort of a modern successor to the Commodore VIC-20. In fact I’ve been writing a tracker for it and I own one of the early (and signed!) X16 Developer edition boards!

Recently, a member of the X16 community, Wavicle, has been working on a Mini ITX variant called the Otter X. It only has one expansion slot but is compatible with the X16 and is available as a kit. I grabbed one up and decided to use the holiday break to assemble it. Since I laser cut Eurorack cases, I thought why not try to make one for the Otter X too! And so I did!

Just like our Eurorack cases, the OtterX case can be made from acrylic, hardwoods, Finnish birch plywood, and MDF. This is still a prototype/beta while I wait on testing a few combinations of parts (such as a lower profile Pico PSU to make the case a bit less tall optionally, as well as perhaps a 3D printed solution for the internal standoffs to keep the case together). I expect it will be finalized soon.

I will make the design open source under a non-commercial license as well for folks that want to cut their own. Those that don’t own a laser cutter will be able to get the cases from me directly as well. If you’re not familiar with the X16, though it’s certainly not Eurorack, it’s worth taking a look! The sound solution in particular is somewhat unique, which is one of the main reasons I’ve been following and participating in the project.

Export this to be available in early 2024. If you’d like to get on the pre-order list just use our Contact Us form. And on the Eurorack front expect more case designs! 2024 is going to be finally the year of 84HP cases from us, I can just feel it!

Posted on

Improving the GB Wave Step Sequencer

I’ve been hard at work adding features to my GameBoy Wave Oscillator module. It still needs a cool name. I originally called it GAVE (GB + Wave) but I think I can do better. At any rate, I’ve now nearly rewritten the codebase almost from scratch while switching over to C++. There were some bumps but it has vastly simplified things. Oddly my approach with C++ feels not too dissimilar to how I organize 6502 assembly programs (for the Commander X16 music tracker I’m writing, but that’s a blog for another day).

This has allowed me to add some nice features rather quickly. The step sequencer now has 4 modes: forward, backward, ping-ping, and random. The position of the step sequencer (as well as the edit position for adjusting the waveform manually) are now part of the main display. The default step sequence setting is stored within each patch as well.

There are still some features I want to add but I think the module is nearly ready as a minimum viable product, at least to folks that might not mind editing text files to mess around with waves. I want to have a means to generate waves using parameters via Python scripts initially and then plan to add that into the module directly, though I’ll want a better in-module patch UI first.

I plan on building at least one more prototype, in part so I can have two of these in my own rack, giving me 2 step sequences but also letting me do weirdo things with detune and/or using one as a dedicated step sequencer while using the other for audio (and a mix of both).